So here is a picture of Samuel. I won't get to the other pictures until next week but here is a teaser photo of the sweet baby boy.

| Susan Rogers Photography |
|
|
So here is a picture of Samuel. I won't get to the other pictures until next week but here is a teaser photo of the sweet baby boy.
0 Comments
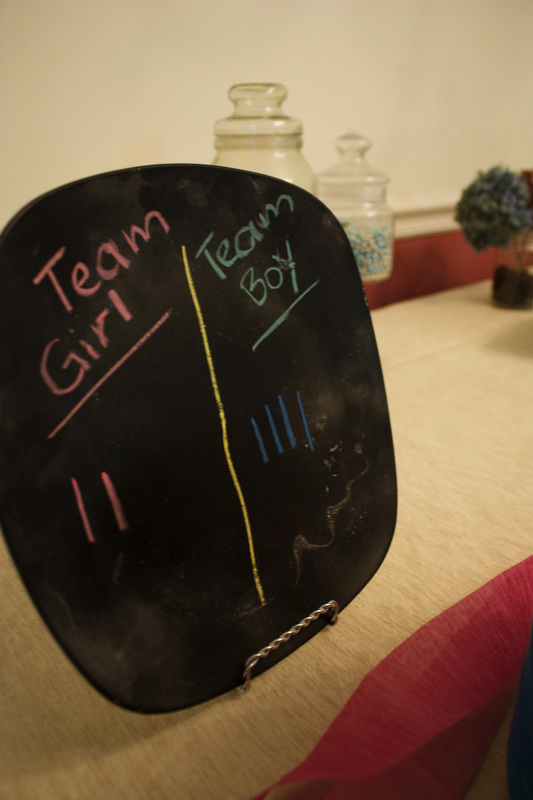
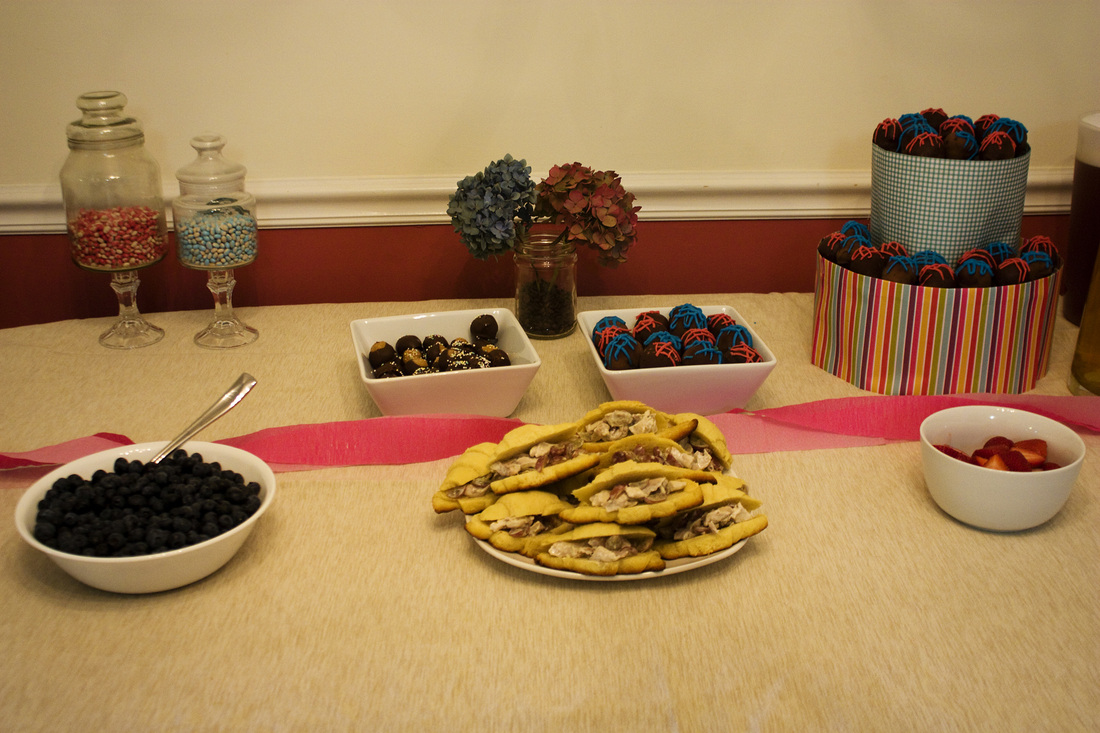
A couple of weeks ago, a few friends and I planned a fun little shower for Kelly in celebration for the baby on the way. The gender was a surprise so we themed it as a competition to see what gender everyone was guessing the baby to be! It was a surprise party, so it was hilarious when Kelly came in sporting blue (and she told us later that she had almost worn pink that day). It was fun getting to spend some time with her and getting to shower her with freezer meals (we did that instead of gifts so that we might bless her in upcoming hectic days).
As you can see, most people were voting for a boy (I actually thought it was going to be a boy too but I thought Susanna was going to be the only person on team girl so I sported pink with her) 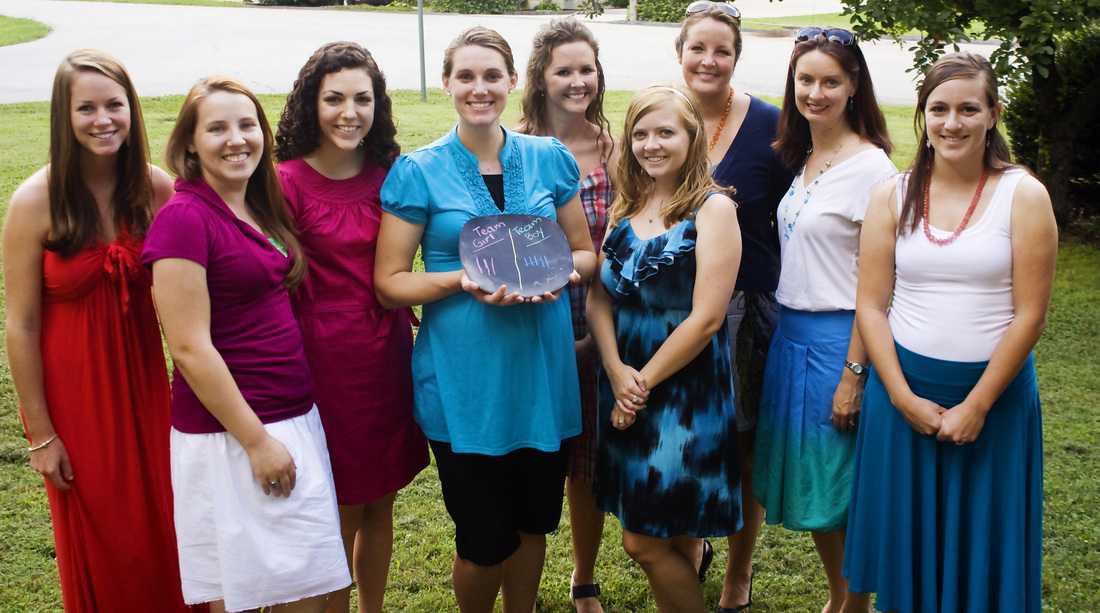
Anyways, Kelly went into labor this morning and had a healthy 9lb 10oz baby boy this afternoon! Congrats to Kelly and Barry on their new addition as well as to team blue for guessing the correct gender! Can't wait to see him!
Thanks to my friend Becky, I have been informed that I never posted the rest of my tutorial on our ottoman that we converted into a storage ottoman and reupholstered. I remember writing it, but I guess when I hit publish, the website refreshed, the data was lost and I didn't realize it. So here it is, half a year later, part 2 of the recovered ottoman. To see part one, go here. The reason why I had to do this in two parts is because we didn't have everything we needed when we jumped into the project that first day. To make it into a storage ottoman we needed two boards: one for the bottom to hold stuff in the ottoman, and one for the bottom of the top cushion to turn it into a lid. In a nutshell, on day one we took the ottomans elements apart, the next day I went shopping for the two boards. The nice man at Home Depot cut them to size for me. Unfortunately this only works if you write down your measurements correctly...which I did not. So on another day we had to ask a friend of ours if we could use tools to cut them down again (thankfully they were too big, not too small). Finally, we got the boards to the correct size and that is where this post picks up. We cut a piece of fabric that was long enough to wrap all the way around the ottoman, ironed it, then wrapped it around. Make sure that you have a couple of extra inches in length so you can fold the raw edges under. Fold the raw edge under and staple the corners of the edge to the bottom and the top inside. Stretch the fabric tight as you work your way around stapling the fabric to the bottom of the wood and to the top inside edge of the ottoman. When you get all the way around, tuck the unfinished edge under and staple in place. 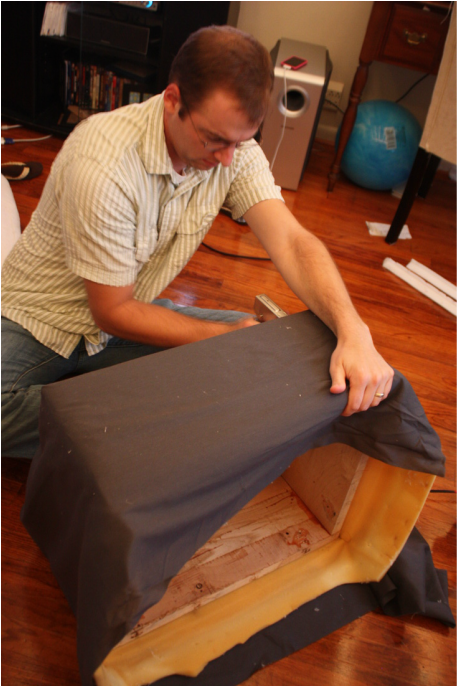
Once you are done with that, screw one of your boards to the bottom to cover up all of your staples. Since ours does not sit flush with the circumference with what's above it, we chose not to paint it since you don't normally see it. Measure (or if you are good at eyeballing like I am, guestimate) to where the feet of the ottoman were screwed in originally and screw them back in. The bottom half is now done. 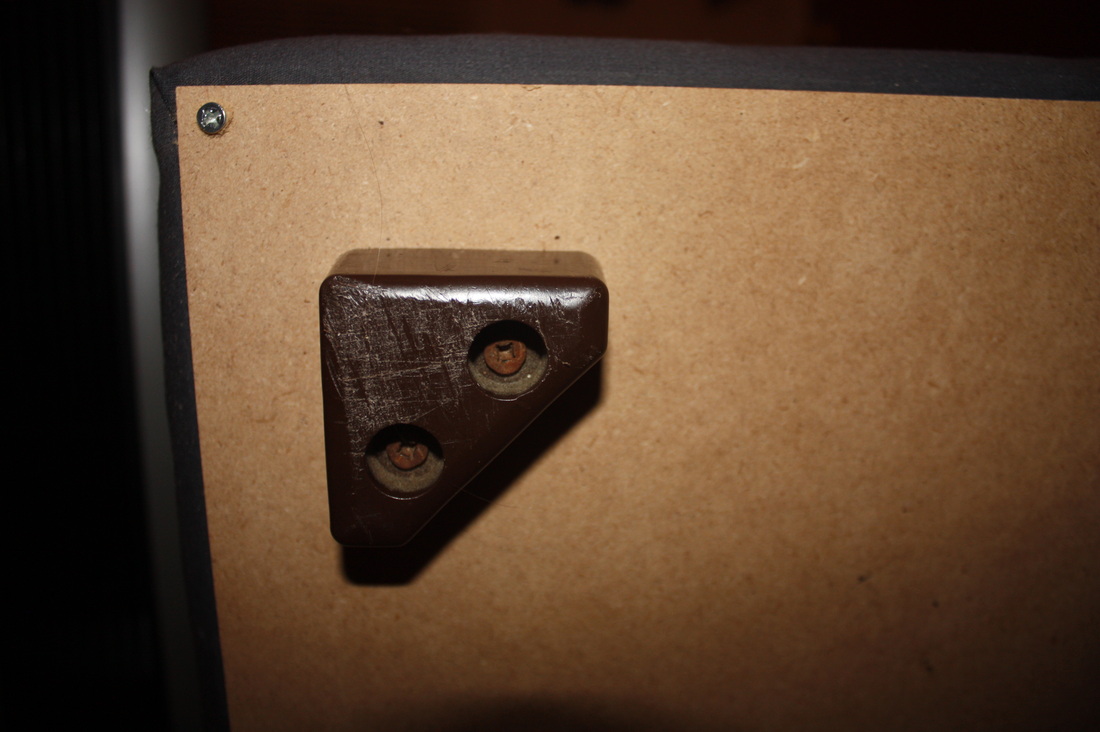
I kind of made the lid up in my head so I don't know that this is a great method for making a lid or not, but so far it is working for us. We put the other board on to of the cushion, stretched fabric around the cushion and stapled the fabric into the board. If you do this, just make sure your staples are not longer than your board is thick or you might sit on a staple one day. I don't have a picture for the next step, but we trimmed off the extra fabric, measured a square of fabric the same size as the board, tucked the raw edges of that square under and glued the square onto the board so you cover up the board and the staples. 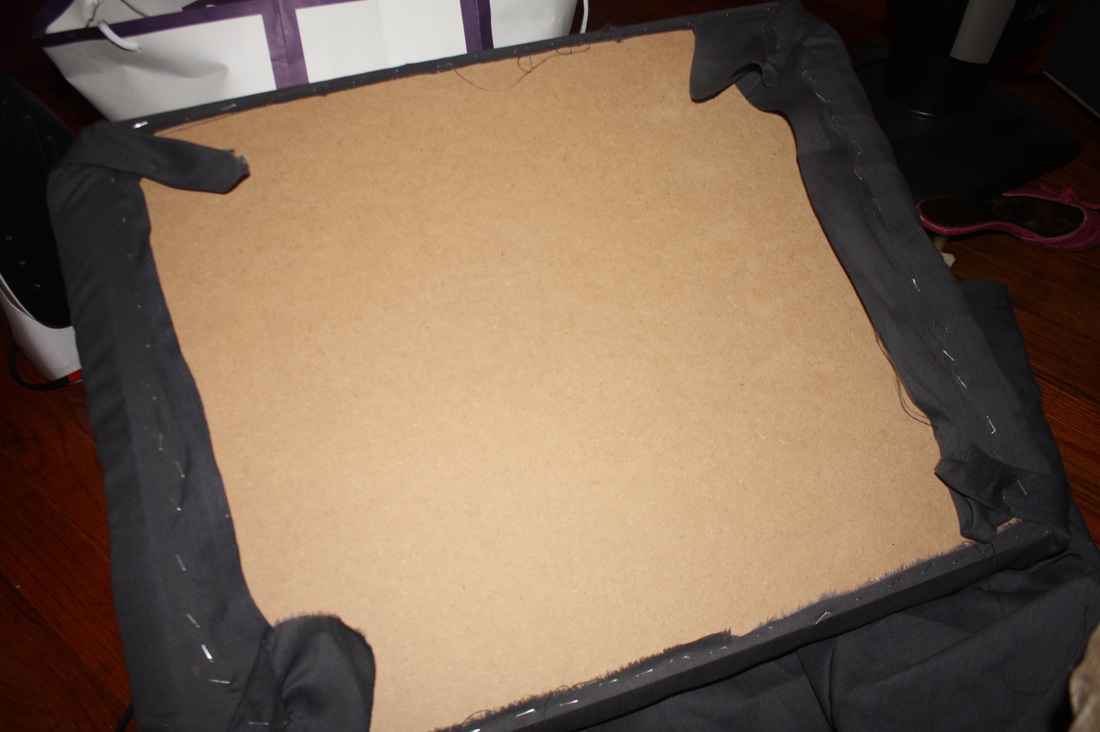
And that's it! I love having a place to put our throw blankets in the living room now. Its surprisingly spacious so I can fit a few blankets and my current crochet project inside. 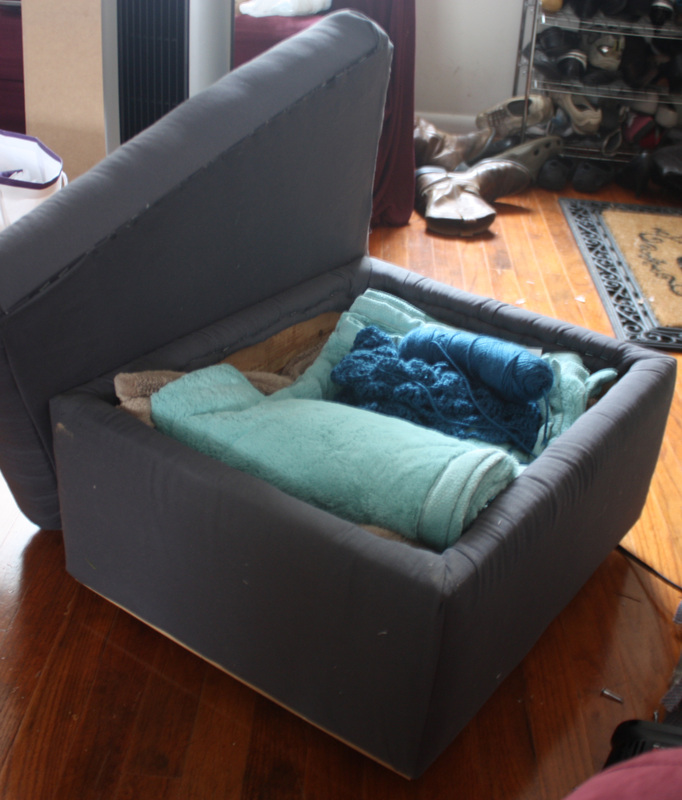
Thanks Becky for letting me know that I never got the post up!
So many of you know that Will and I vacationed with his family a couple of weeks ago. I didn't get a chance to blog about it earlier because I had to make up all of my hours that I missed at work last week. I've updated some of you on what happened...but since its such a long story, I've only given the summary of it out. So here is the extended version. Will and I left Sunday afternoon for Williamsburg, Virginia. It was smooth sailing, a good trip even (for the first 5 or so hours). We listened to an entire secret church by David Platt, traffic wasn't too bad and the a/c worked so it started out as a good trip. Then when we were 110 miles away, my car started shaking really badly. It felt like we had a flat tire so we pulled over. Will checked all the tires and they looked fine so we thought we were imagining things. I got back on the road and only made it back up to 40 miles an hour and the car started shaking violently again and fishtailing. Needless to say we pulled over again...the only problem is it still looked like nothing was wrong! We were about to call AAA When we saw there was a weigh station half a mile in front of us thankfully. So we waited for a break in traffic and drove to the weigh station going 20 mph on the highway. I'm so thankful it was there because it was an hour and a half or so before AAA could pick us up. They got us and we finally pulled into the hotel around 11pm 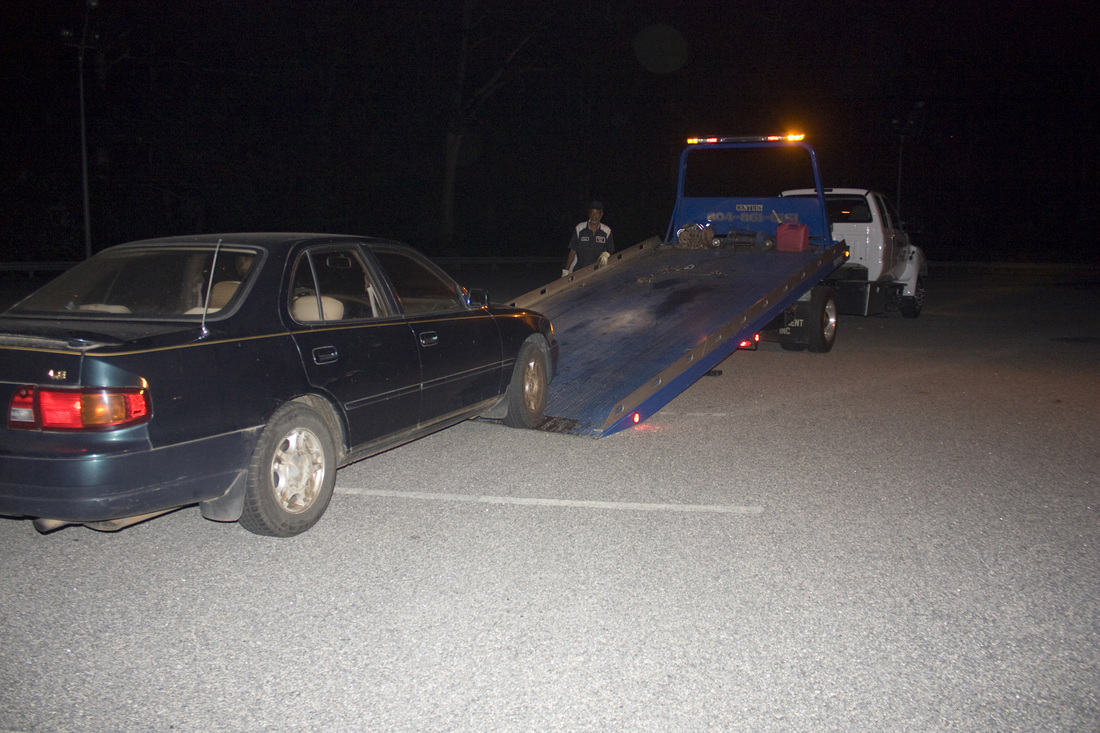
When Will and I took my car to get it fixed, AAA wouldn't have time to even look at it until Thursday (the day we were leaving) so we had to take it to the Toyota dealership. When they called us back in later that day after inspecting it, we walked up to the mechanics and politely asked them how they were doing to which they responded that they were doing a lot better than my car (yikes). They then walked us through every thing that was wrong with my car. The list was as follows: 1. One of the bands in the back tire had busted, leaving the tire really lumpy (this caused the violent shaking). 2. The two front tires were starting to reveal steel on the inside edges because my car was so unaligned 3. All four struts on my car had apparently been shot for years but someone had tried to cover that fact up by propping them up with foam pieces...the guys couldn't tell how long ago that had been done, but by looking at the pieces its been at least a few years (that was super reassuring) 4. The boots on the two front axels busted awhile ago so the axels now need to be replaced because it will start to rust soon. 5. Everything that can leak is leaking (except for the gas I think) 6. The back breaks are at 20% 7. Something with the rear sway bars was wrong as well The guys were sympathetic and said that they would fix the bare minimum that we needed to get home which was the first three things that I listed. The bad part was that replacing the tires and the struts cost us more than what our car is worth. The two things that topped it all off: 1. Will's mom got into an accident coming to pick us up from the Toyota dealership. Thankfully no one got hurt. 2. On the way home on Thursday, we picked up our car and started on our way home. Within 45 min my car made 3 loud popping/cracking sounds and on the second one, we definitely saw something metal flying from my car. We then drove all the way back to the dealership and they looked at/worked on my car for another 3 hours. The guy then came out and said it was this little rubber piece that cut down on noise. However, It was one of those conversations where he was just being a little too sweet....The kind of nice where he is being nice to cover his own butt and serve his own purposes rather than to serve us. I believe that little piece was a partial truth but I also believe that he was covering something they had done wrong the first time around because there were too many holes in his story and explanation (real assuring I know)...so we didn't get home til 11pm and we had left at 10 that morning...What a day and what a week. Though through it all I could still see the grace of God working. That one tire revealed the issues my car was having and if the problem was revealed by one of those foam pieces failing, the situation could have been much worse and other pieces of the car could have been damaged so in that God protected us in that. I'm so thankful that God allowed us to break down right beside a weigh station so we weren't waiting on the side of a busy highway. I'm thankful that God gave Will's mom a feeling that she should up her towing service on AAA from 100 miles a year to 200 mile towing because that extra 10 miles we would have had to pay for otherwise would have cost $50. I'm also thankful that God provided for the repairs through money that we had saved for some thing else and through money that had been given to us the week before. I'm also so thankful that we finally made it home safely from that long week. Don't you hate it when you are so glad to get back to work so you can de-stress from your vacation? Anyways, here are some pictures from the happier moments of the week... 
We went to Busch Gardens on Monday. This is the first roller coaster Will and I ever rode together...and it was a good choice because it had a little bit of everything 

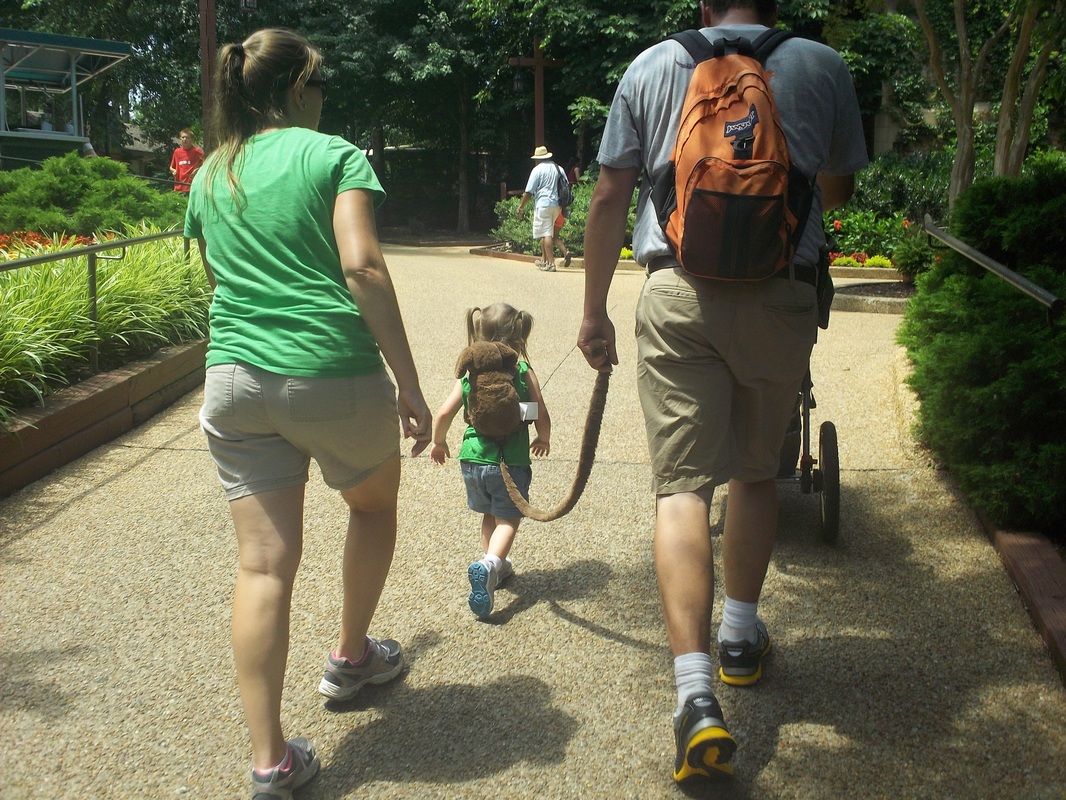
This is my niece...and yes, she is on a leash...hilarious! 
Will tried to catch a ride with Kennison, until the guy running the ride chased him off
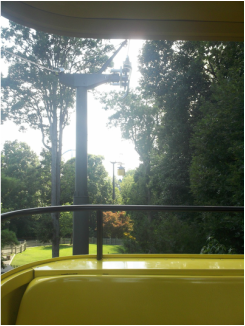
Gondola Ride! Can you tell how hot and tired we are? 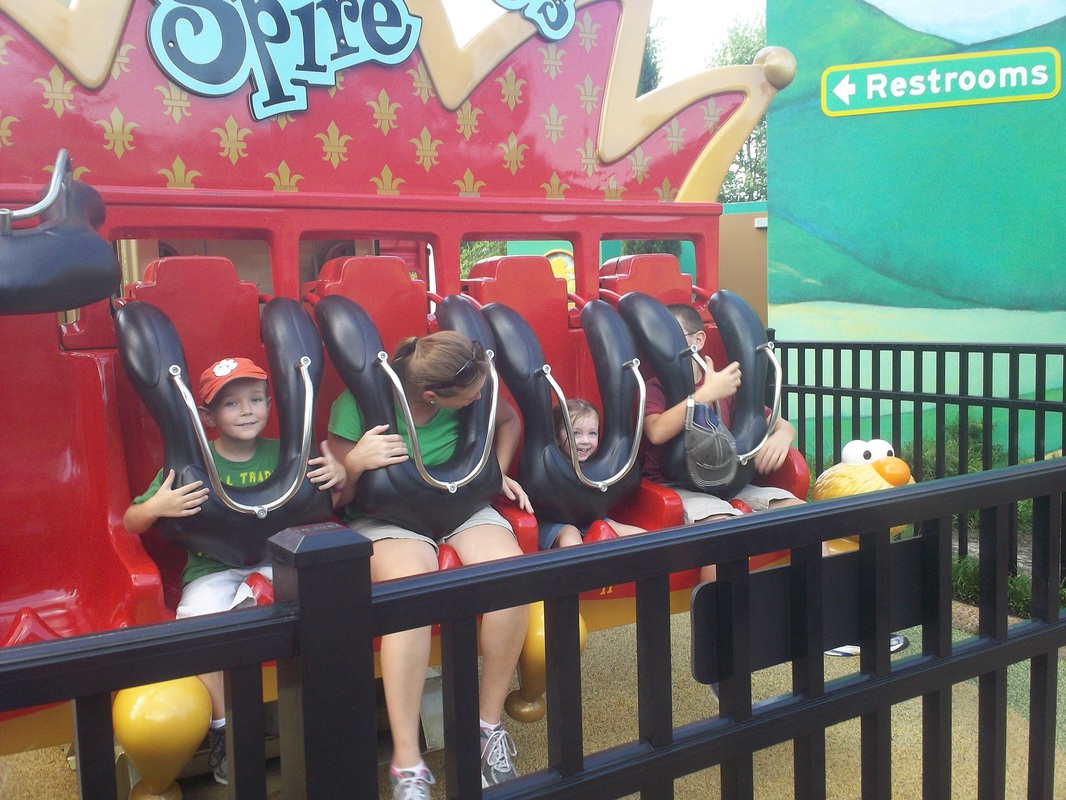
Kennisons first big girl ride. I love how you can barely see her over the shoulder pads. 
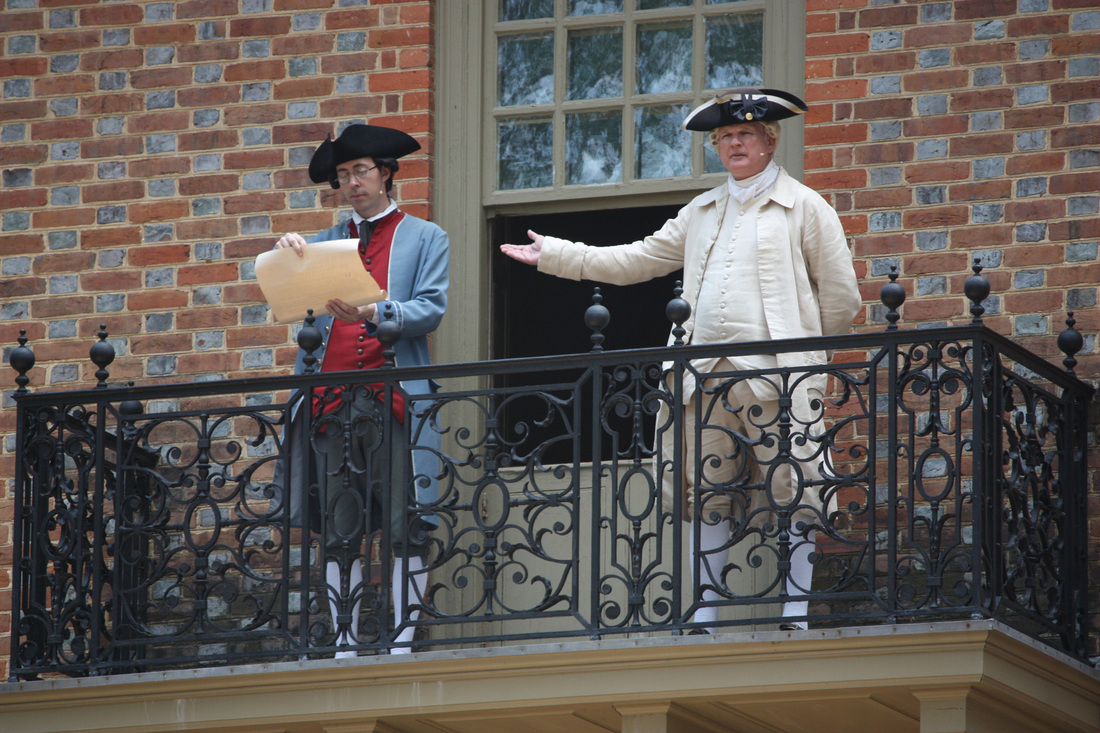
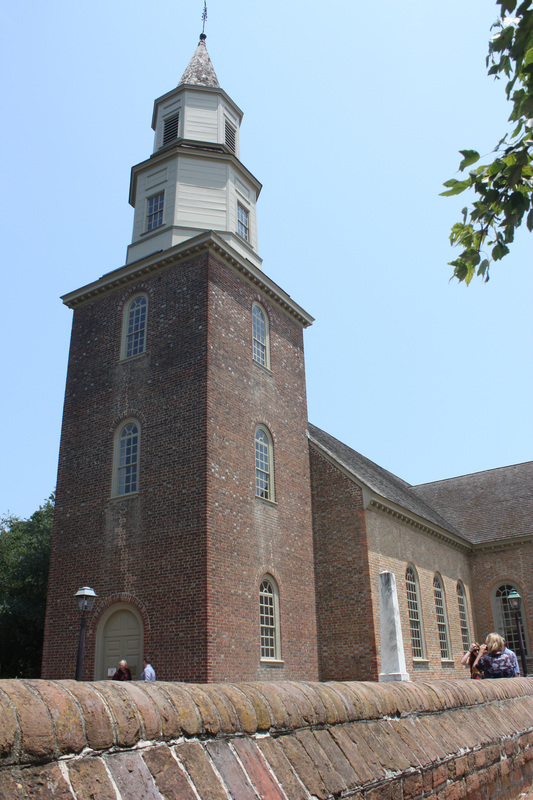
On the 4th of July, we went to historic Williamsburg. Please note that Will chose to wear a hat that says England in colonial Williamsburg where they were doing a reenactment of the signing of the Declaration of Independence. 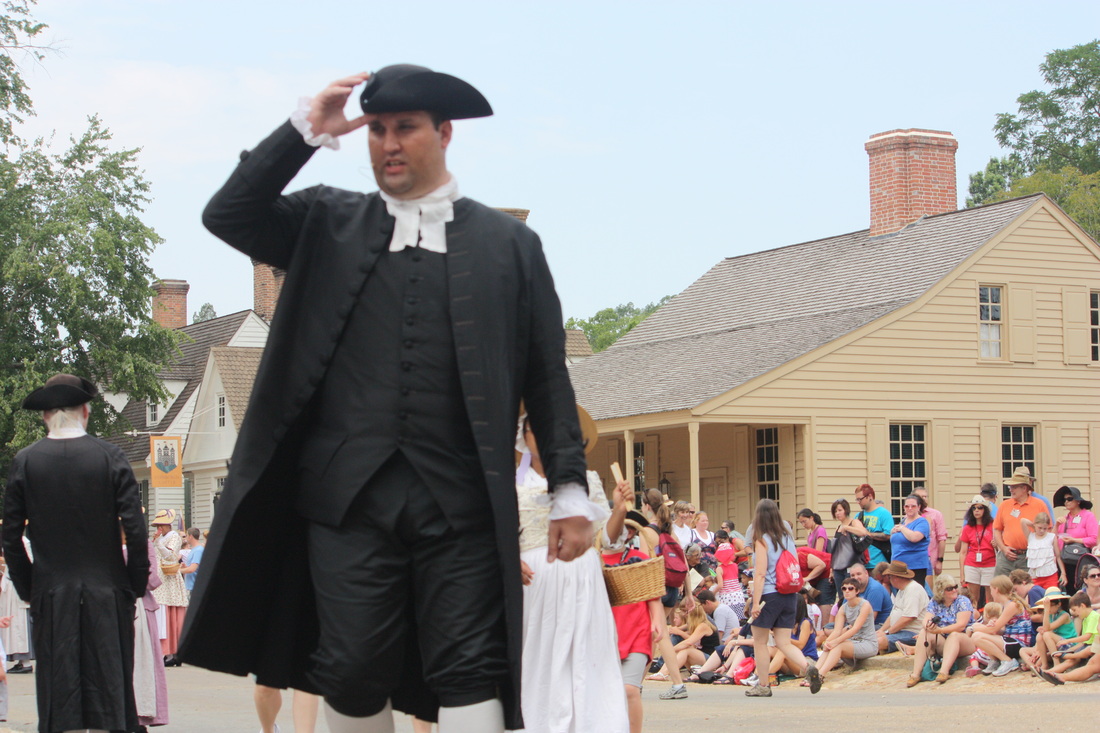
They had a lot of great actors who were dressed the part and stayed in character really well. I wish I had gotten a picture of her, but there was this really funny lady who acted just like Mrs. Bennet from Pride and Prejudice and she kept going around an causing trouble with all of the clergymen. 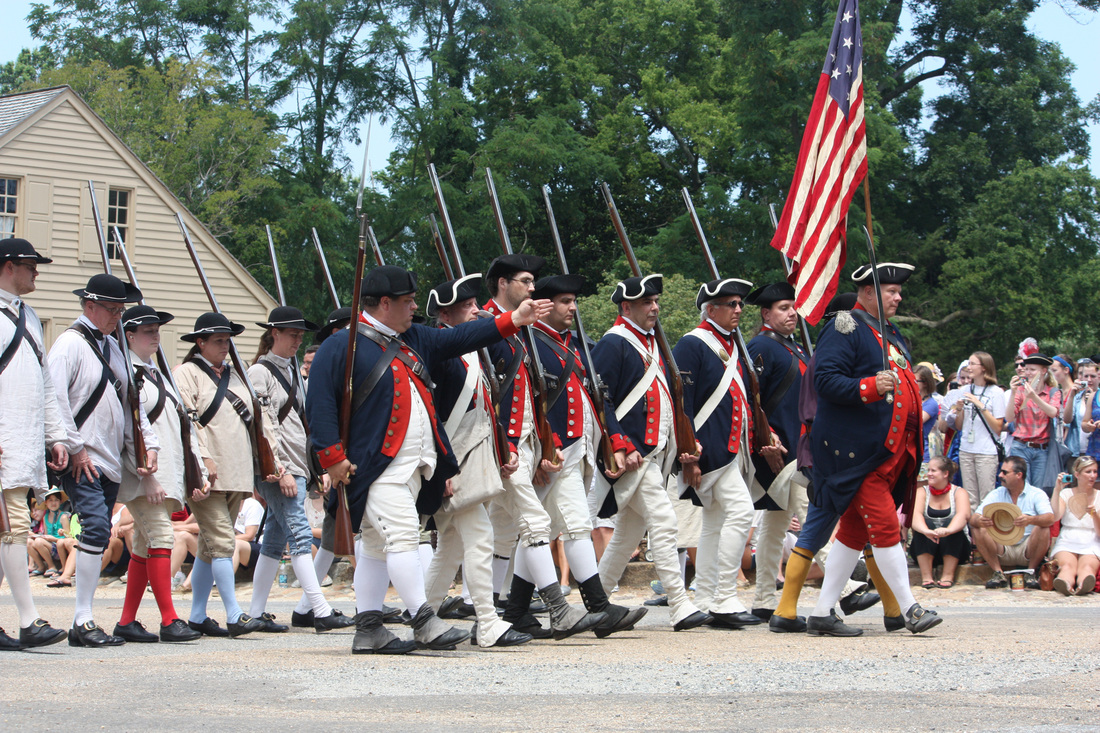
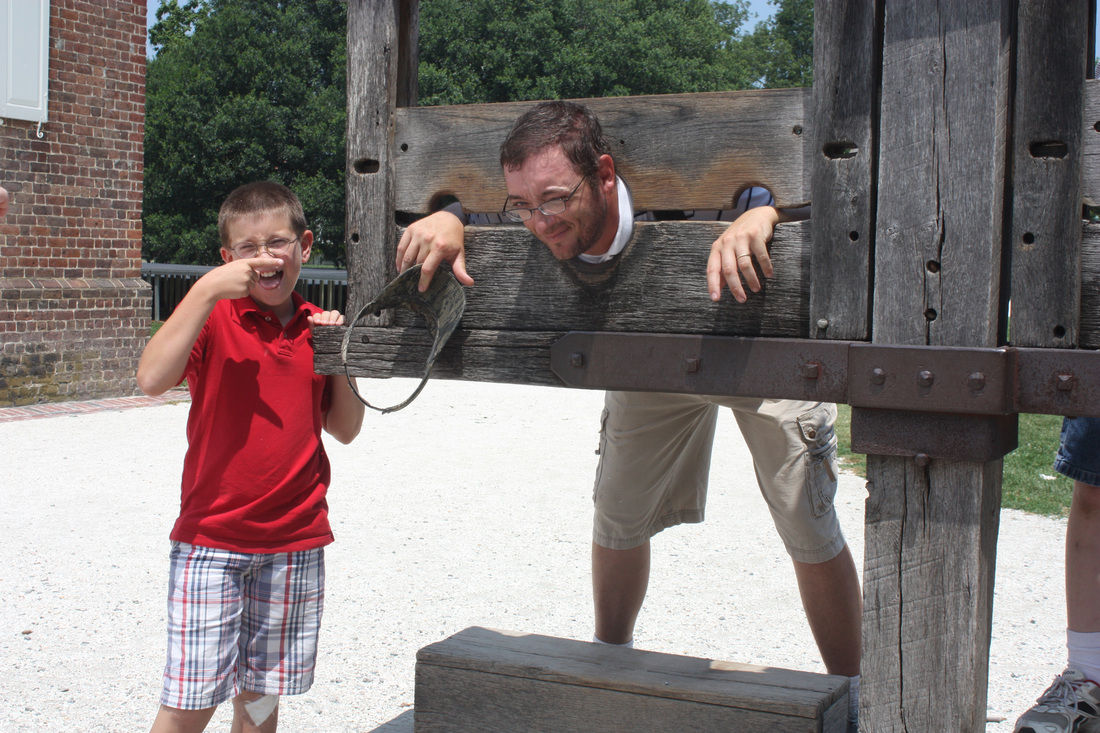
I think my nephew Taylor enjoyed seeing his dad in the stocks a little too much 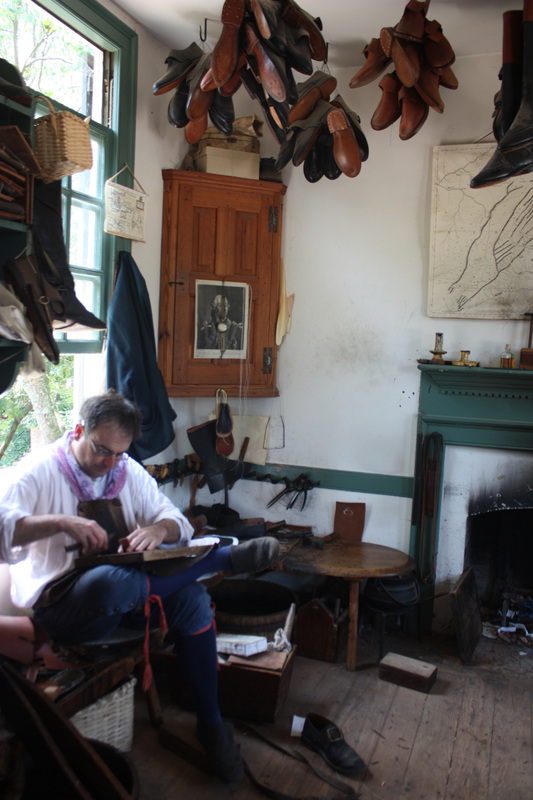
This guy was actually making shoes the old fashioned way and explaining the process to anyone who asked...it was awesome!
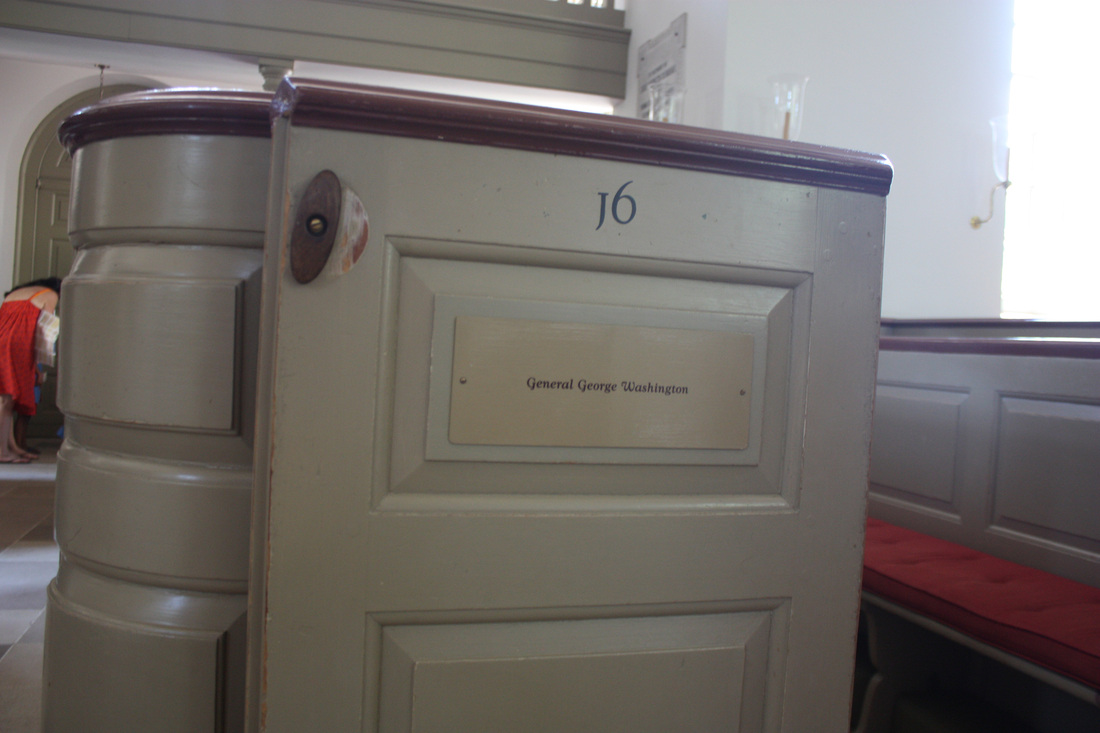
We found the pew that George Washington sat in...and believe it or not but this is still a functioning church and it still holds a service everyday. 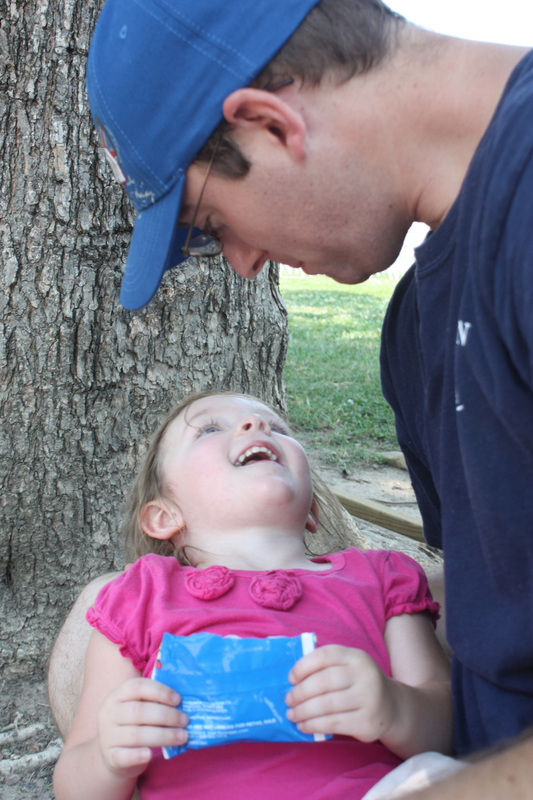
Can you tell Kennison loves her Super Ray! I don't think I mentioned before but our niece and nephews call us Super Ray and Wonder Susan instead of Aunt and Uncle. Its funny. It also gives us reasons to make up all kind of fun stories for them. We told them when we got there that we called the tow truck, not because the car broke down on the highway, but because we had been carrying it the first 5 hours of the trip and just wanted a break.
Anyways, that was our adventurous vacation of the year...and I'm kind of glad we have a nice break before our next vacation! 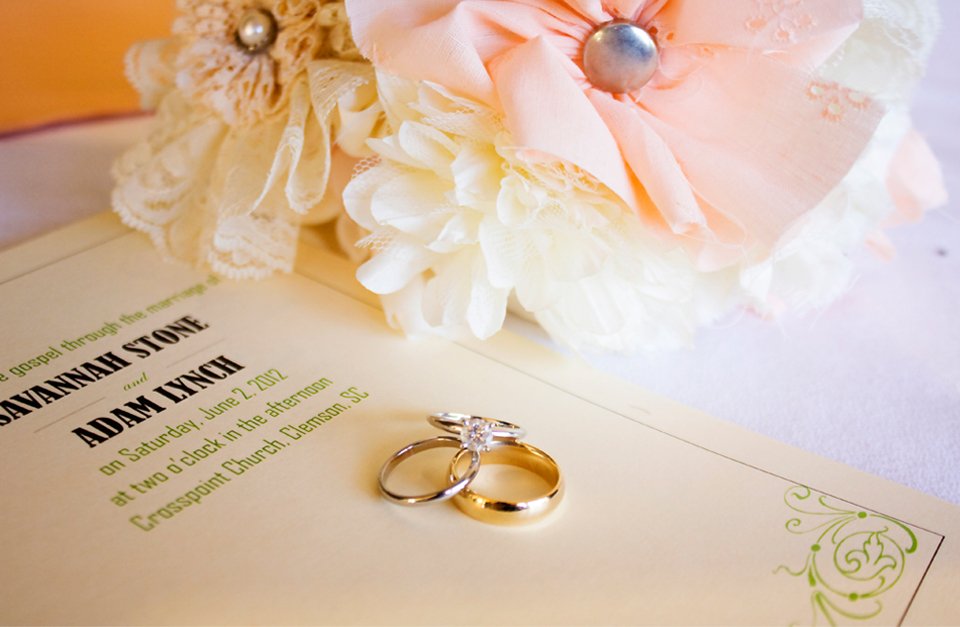  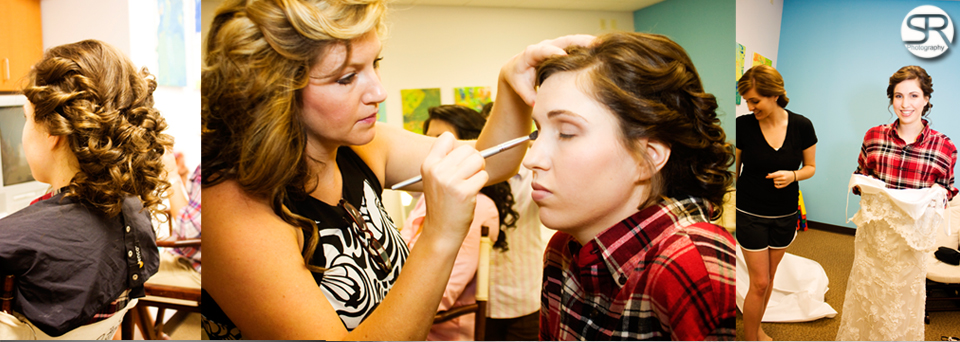 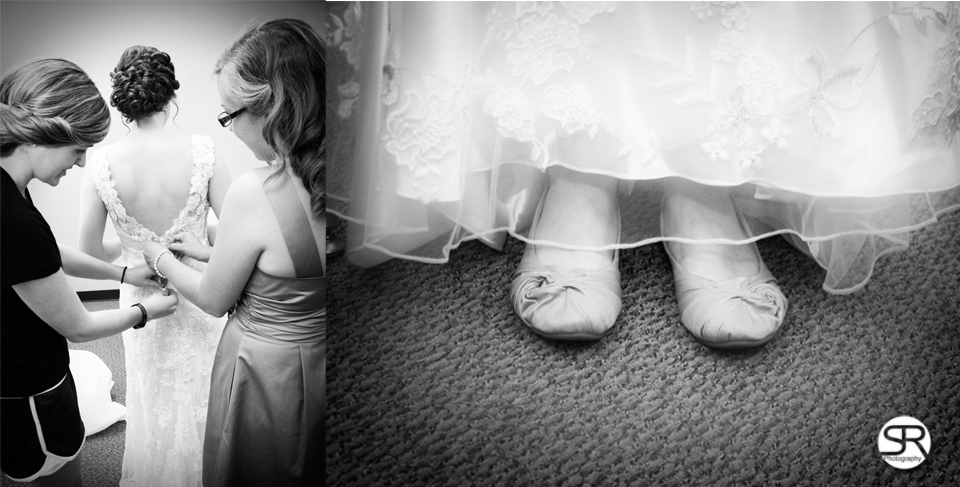 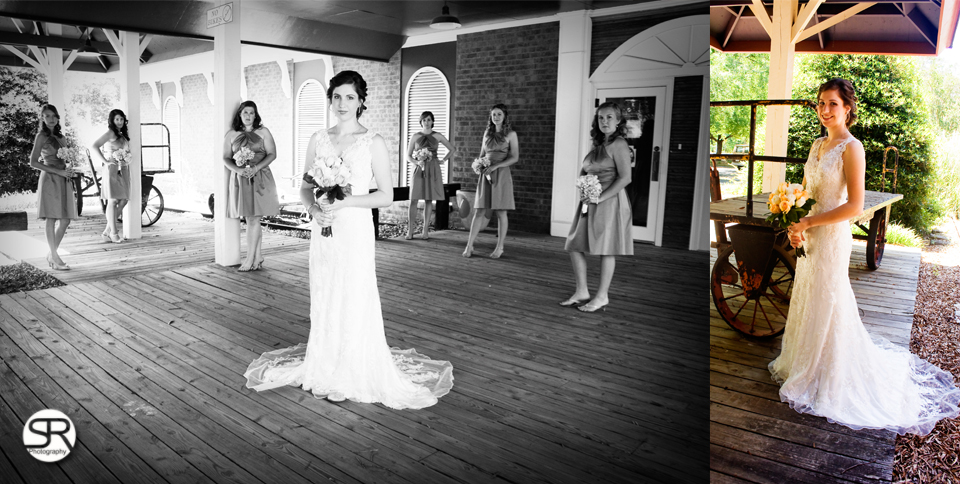 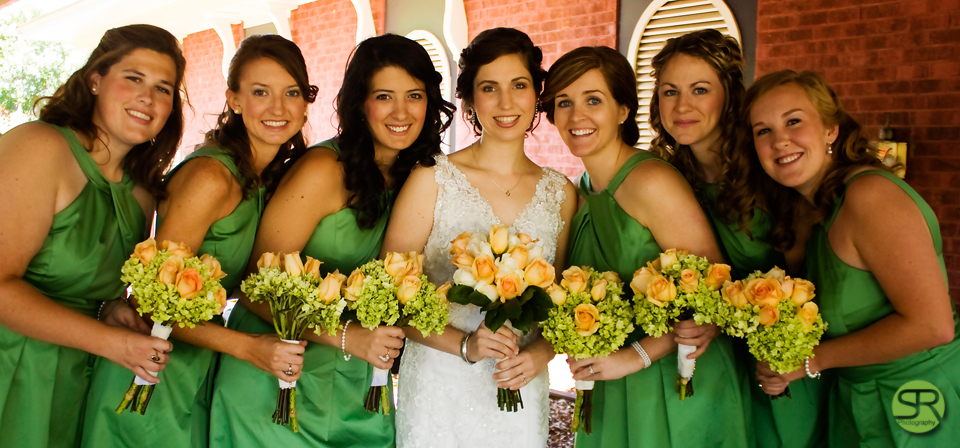 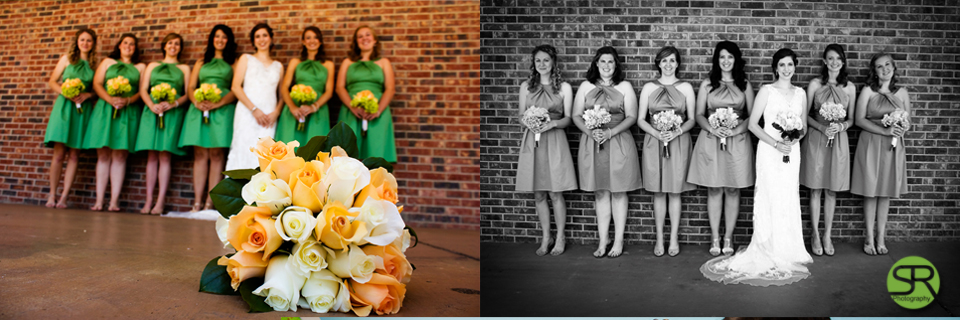 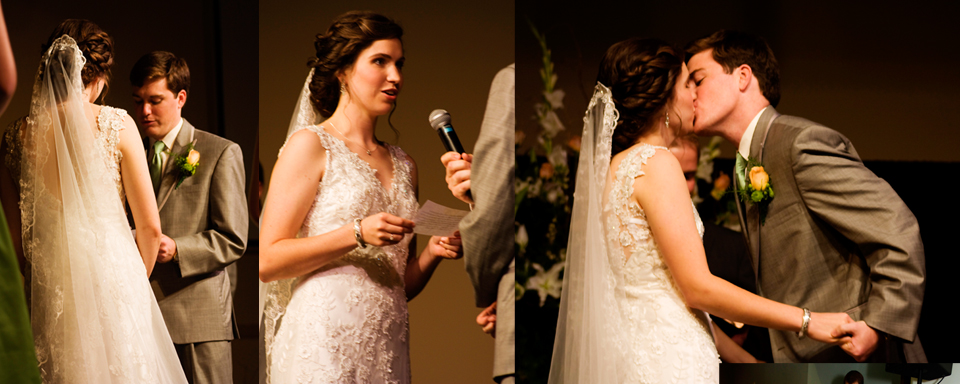 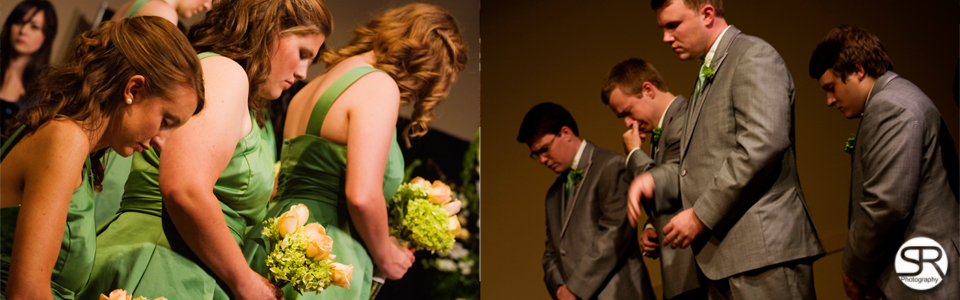 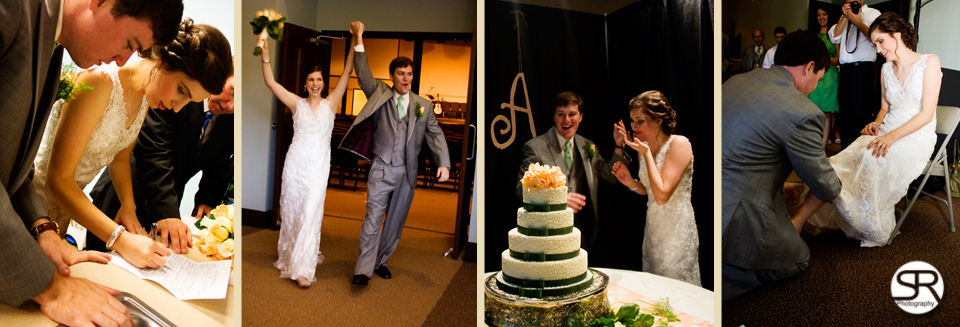 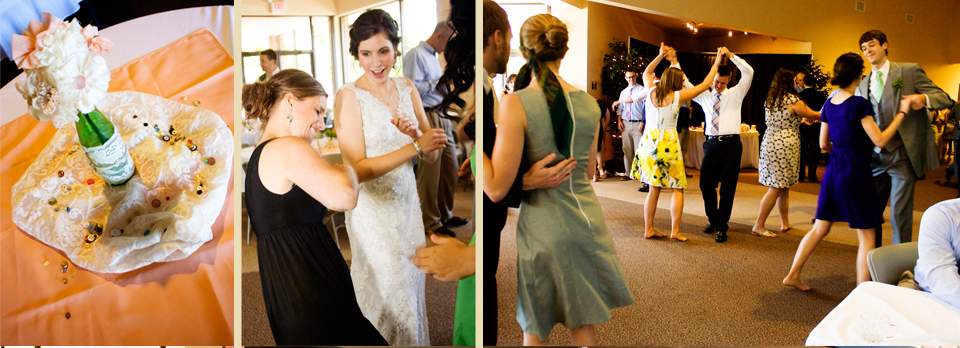 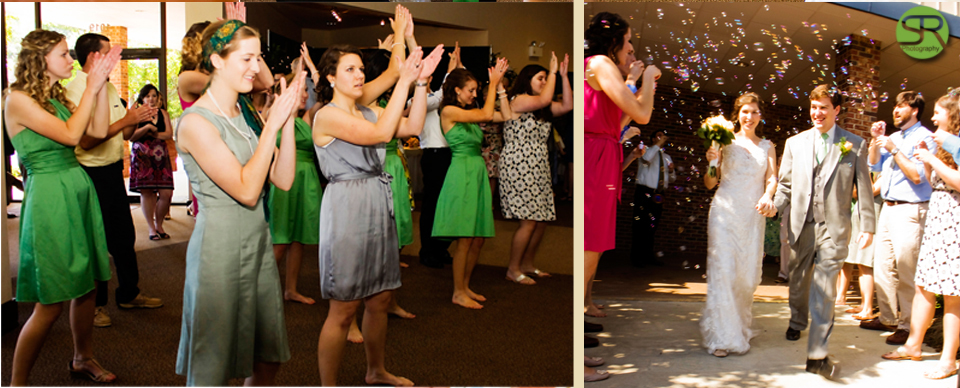 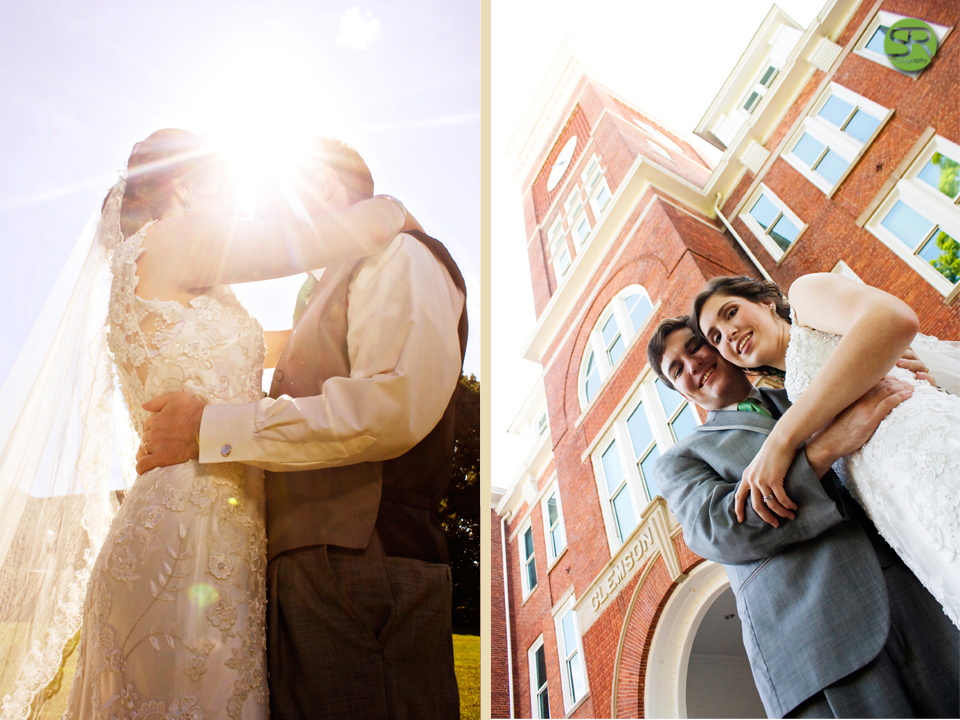 To see move visit http://suzedesign.weebly.com/weddings-and-events.html
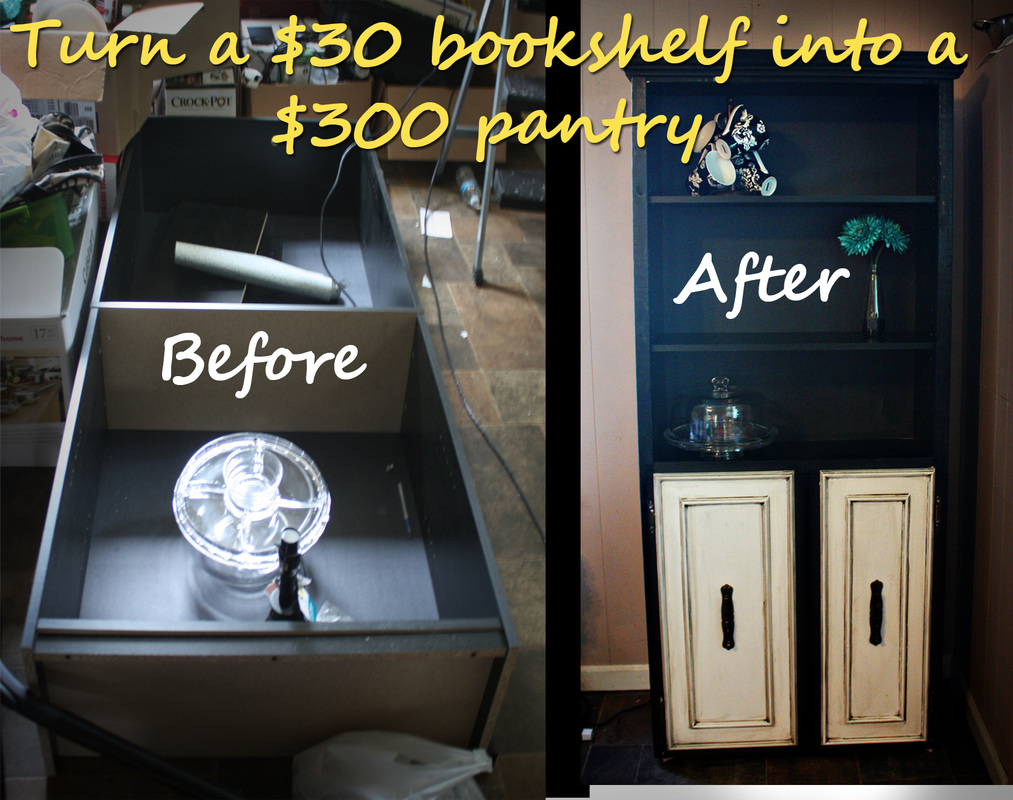 Heres a project that Will and I finished awhile ago, but amongst the hussle and bussle of moving, I never posted on it. Let me start by telling about the dilemma we were in. I've mentioned before, that since we moved into an old 1930's mill house, it has a super simple layout. So simple, the original layout looked like a 4-square court. It wasn't until the 60's that someone added a bathroom to one of the rooms (yay!!) and two super tiny closets. There is no other storage space in our house. Our kitchen is much bigger than our old kitchen, but it actually has less cabinet and storage space since there is no pantry. This posed a problem because the house is not sealed well so bugs come in all the time, and we did not have a place to put any of our food. We went back and forth about getting something really cheap that we would just keep for the time being, or actually buying something that we liked and would look nice long term. We decided to buy something that we liked that was nicer, but no matter how long I searched I could not find anything in our price range that looked halfway decent. The next step up from that cheap standard 5 shelf bookcase only had a little bit of fake wood trim and it was a whopping $200 and it didn't even look great in person. 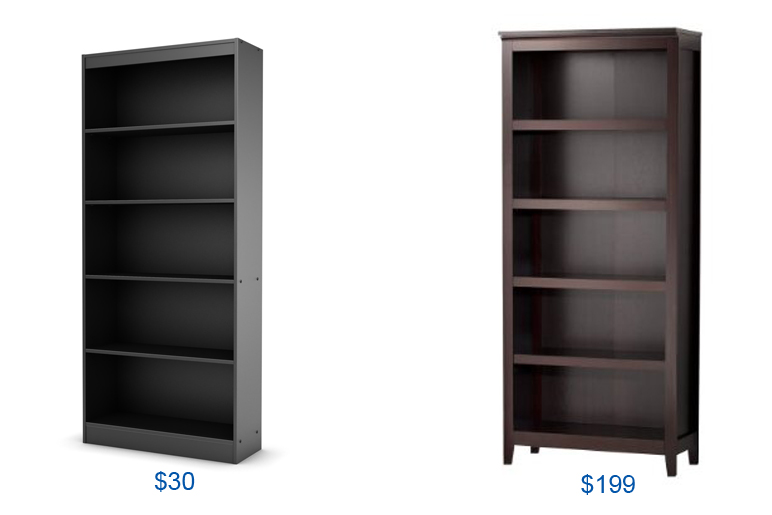 Also, anything that used real wood was in the $300-$500 range based on size, shelves and if it had doors or not. So I decided to do a combination of all of the above. I bought the $30 bookcase from walmart to start as a base. I thought about making it entirely from real wood but that base would have started at $80 which was a little steep considering that I wanted to add trim and doors. It also would have taken a lot longer and we didn't have time for that when we were in the thick of moving. Our kitchen was a disaster zone until this was finished. Here are the totals for what I spent: $30- bookshelf $9- bead board from a habitat resale store $5- two cabinet doors from the habitat resale store $4- fancy trim from the habitat resale store $6- 7 1x2 boards from lowes $9.50- Antiquing glaze from lowes $2- screws I had paint on hand but I used less than a quart of black paint on this project and not much primer or white paint grand total- $63.50 Here's how: Step one: Follow the included instructions on how to put together your bookshelf. I didn't include instructions or pictures on this one because they are probably each made differently. 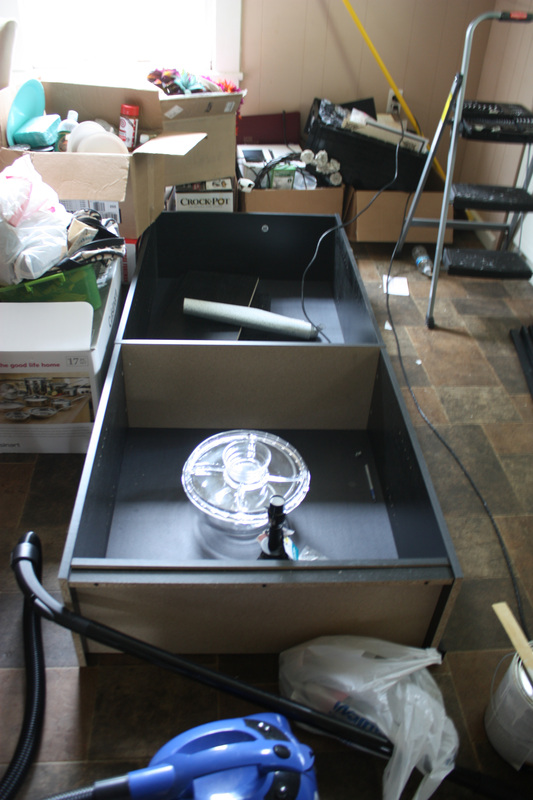 (I told you we were hurting for space and had to get this thing done quickly) Step two: If you have never heard of the habitat resale store, it is awesome because it is the goodwill of building supplies. I measured all of the cabinet doors they had and found these two which fit perfectly. I realize that the doors aren't the same width but I actually like the quirkiness of the two sizes. Once you have doors that fit, sand, prime and paint your cupboard doors (or if you are like me and a little lazy, sand just enough so that the primer sticks)...note--make sure you take off the handles before you paint 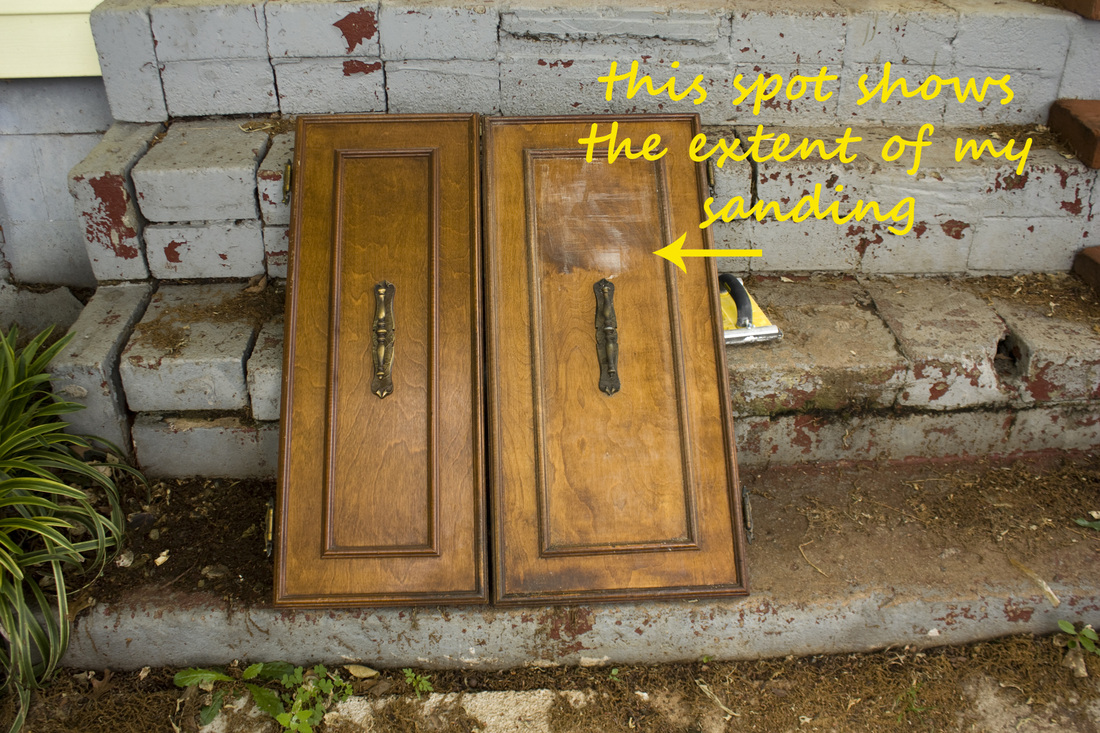 Step three: cut the 1x2s to the height of the bookshelf. If you have a miter saw, use it, they are awesome. If you had to borrow tools from a friend like I did, get a couple of saws as well as a miter box. 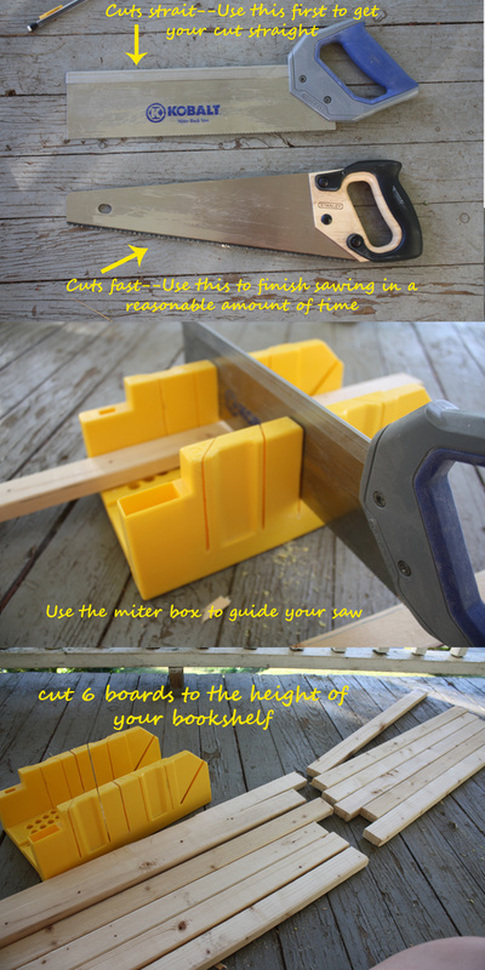 You should now have this:  Step four: Paint the boards to match the color of the bookcase and let dry Step five: apply antiquing glaze to doors and let dry 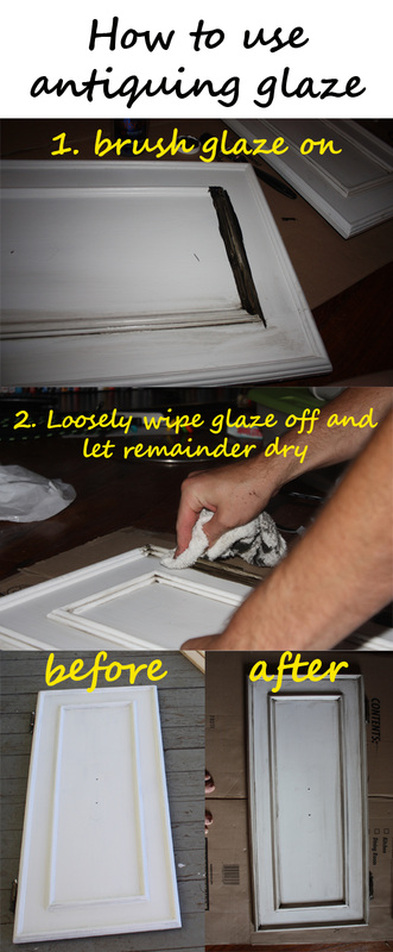 I also used the same antiquing technique to spruce up the handles...Note- it took a lot longer to dry on the handle than it did on the door because it cant soak in 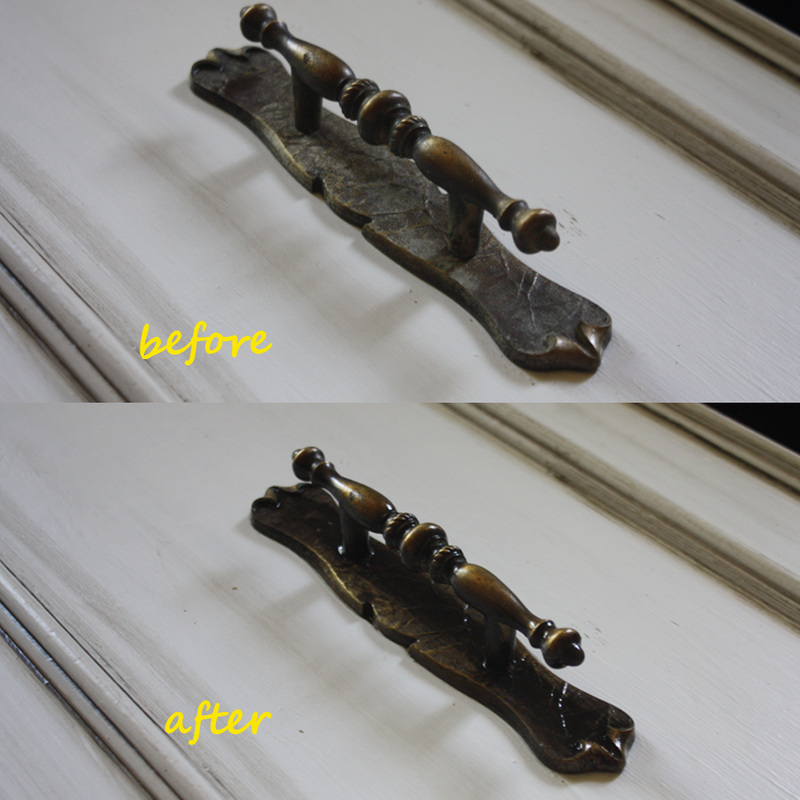 Step 6: Now that your boards are dry, screw two boards on each side flush with the front and the back edges. (4 boards total) Step 7: Screw your remainder two boards on the front to cover the trim edge and the bookshelf edge 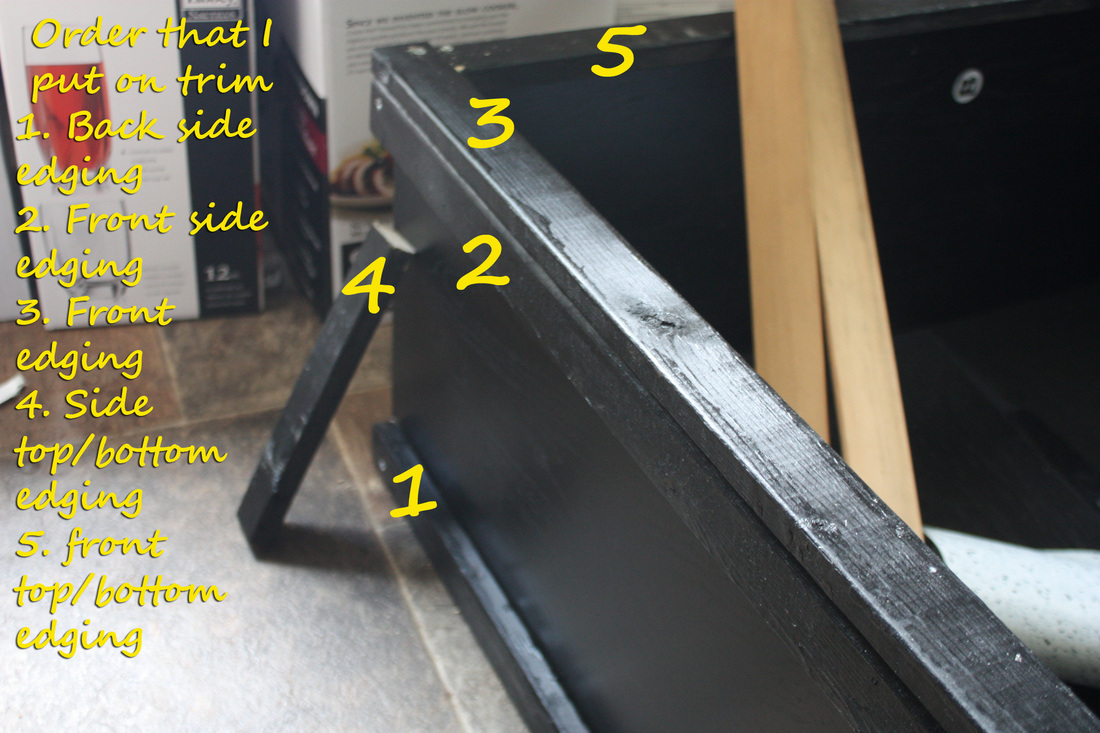 step 8: measure, cut, paint and screw in the top and bottom edging for the front and the side (see above for clarification Step 9: Once you have all of your edging on, your cabinet doors should be dry and ready to screw on. (If you get the doors from the habitat store, the hinges will already be on them so you dont have to worry about aligning the hinges on the door.) screw in the hinges to appropriate places on the front trim 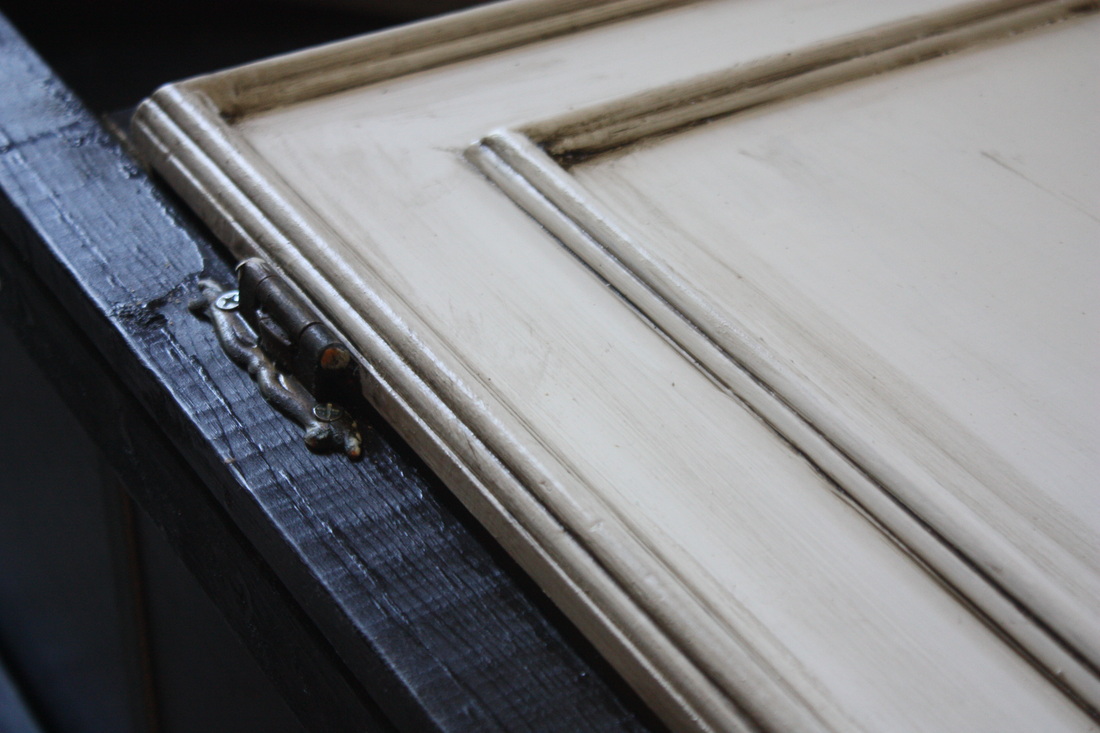 you should now have working doors...yay! 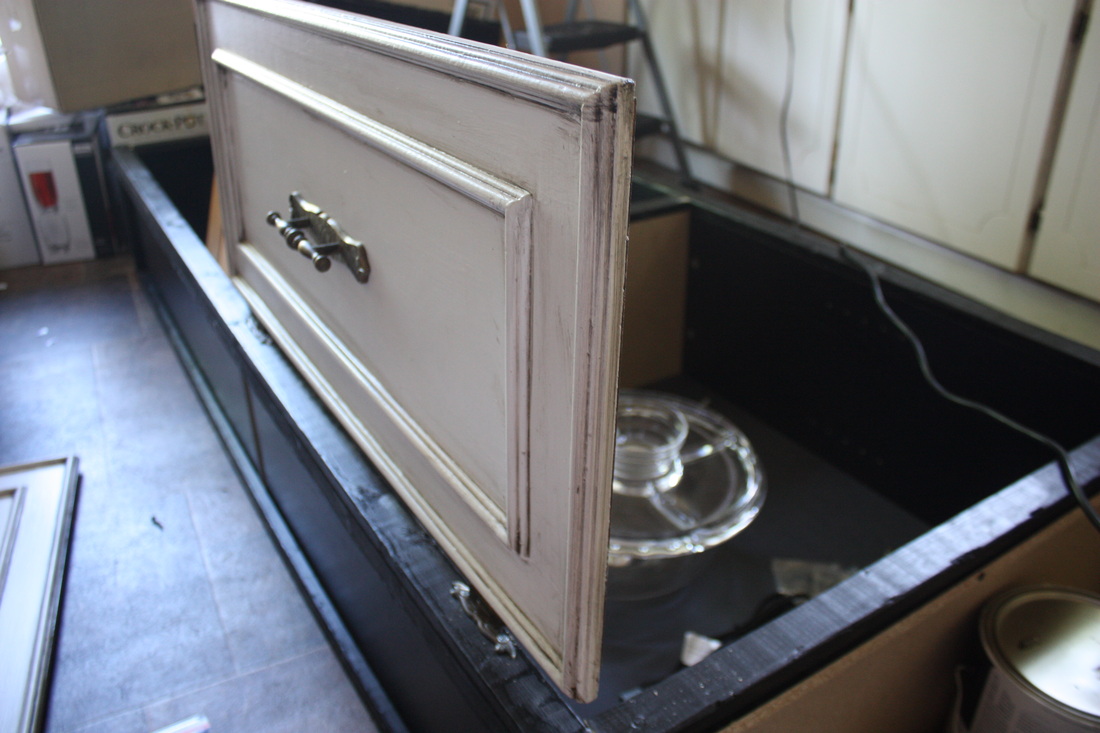 step 10: Measure the bottom of the trim to fit the sides and front of your bookshelf and then use the 45 Degree slot in your miterbox to cut to that measurement (on the the back... the top of your trim will be longer than this measurement) 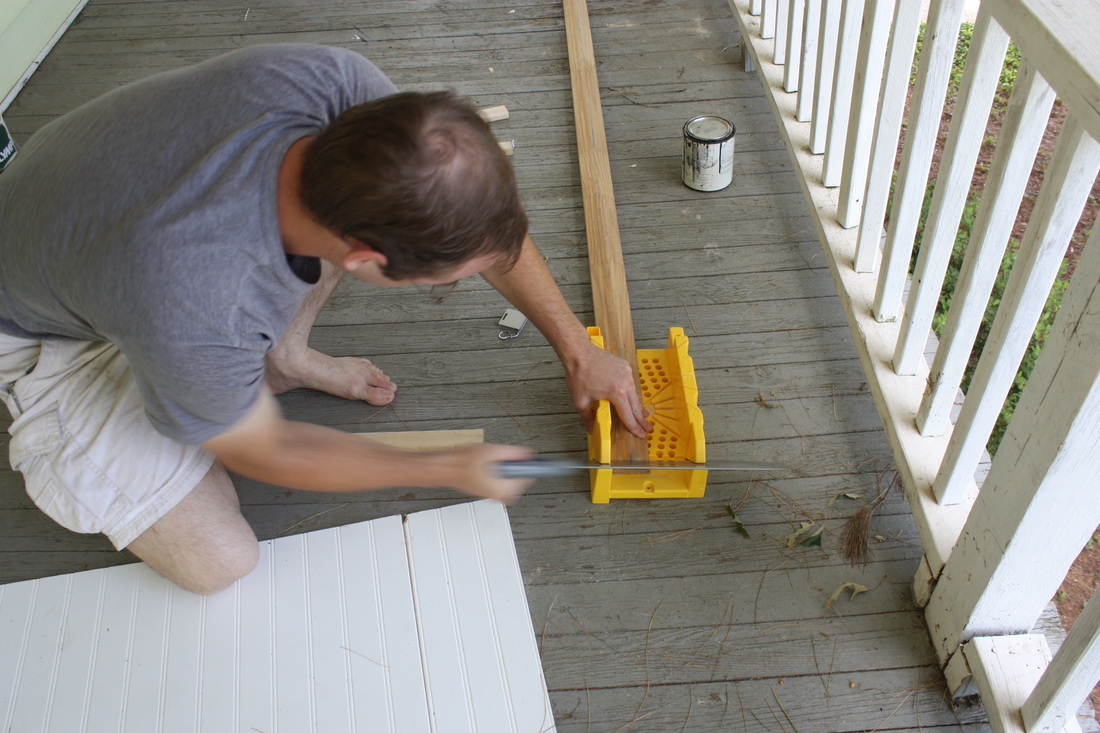 step 11: make sure your measurements will fit together nicely on the bookshelf, then paint and let dry step 12: woodglue the trim to the top of the bookshelf and let dry 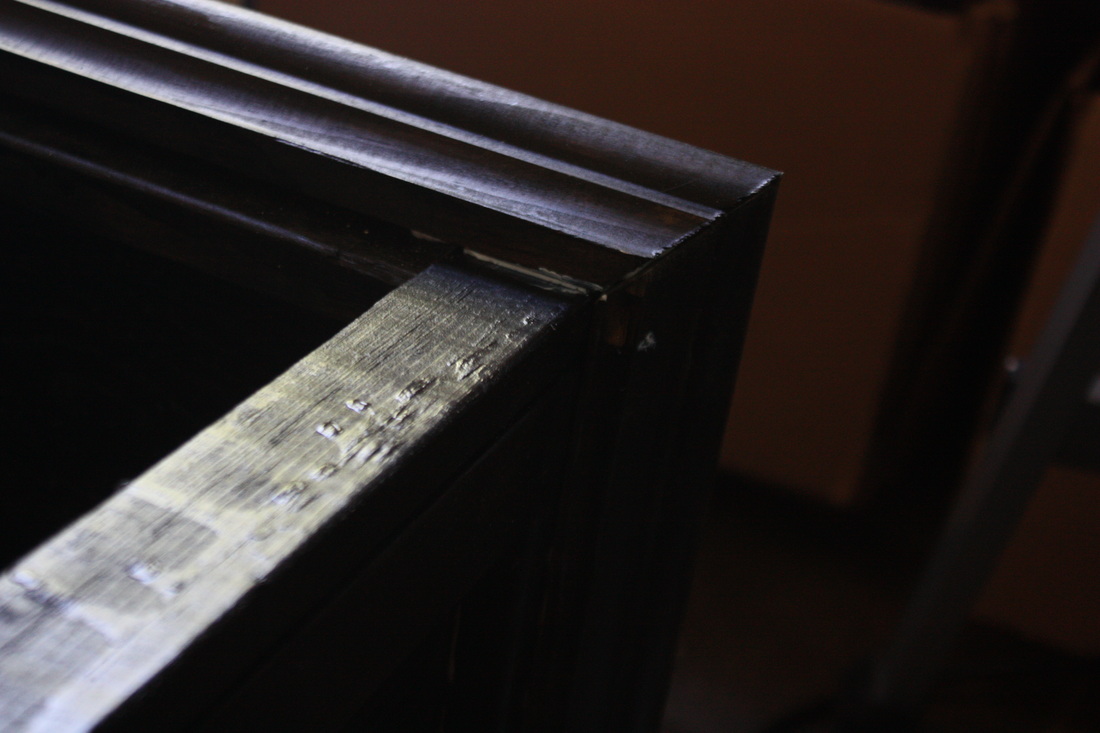 Step 13: pop that bookshelf up and smile because you are done 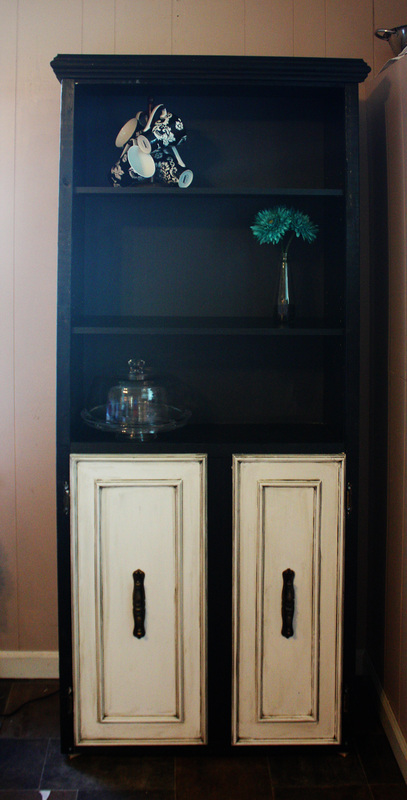 what it actually looks like as our pantry 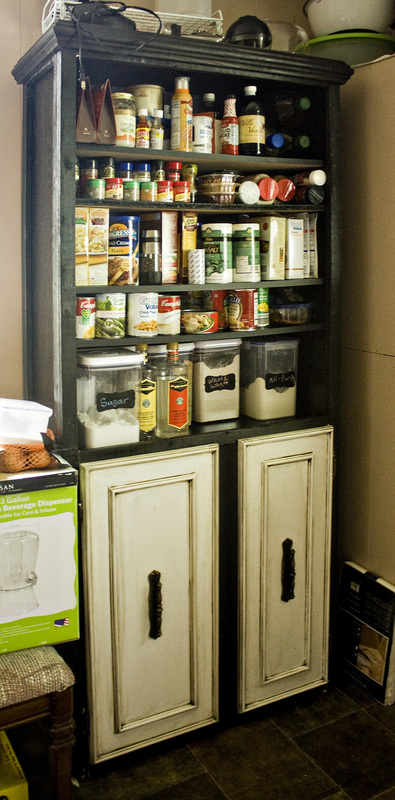 For this, when we were at lowes we had them cut a couple of extra shelves for us. We then used the existing pegs on the inside of the bookcase to hold all of the shelves so we were able to give each category its customized height.
Our Categories Misc Baking supplies- shelf is in the top peg spices- shelf is 4 pegs below the top shelf boxed items (cake mix, instant dinner mixes, bread crumbs, etc)- top peg in the next section of peg holes canned items- 5 pegs down from previous shelf flour and sugar- sitting on fixed shelf legumes and rice- inside top shelf (not shown) whole grain wheat, oats, and rice in mass quantity on bottom shelf. (not shown) and as you can see it all fits perfectly! You might be wondering that I listed bead board but never used it. (if you don't know what bead board is, it is pictured in the bottom left of Will sawing the top trim) With this we are going to make a door for the top part of the pantry but haven't had time for to do it yet so keep your eyes peeled for more 
I noticed the other day that I have 723 pins (yikes!) and have only attempted around 20 of the projects and recipes that I have pinned. Since pinterest is obviously becoming counterproductive I am going to try something new. I now have a board that is for my next 10 projects. I can have a max of 10 projects that I can do or think about doing and I won't be surfing pinterest as much unless there is a spot to fill. I have numbered them but I won't have a strict "go in that order" because I know I will want to bounce around (and its better to bounce around on 10 projects than 100). So here are my next 10 projects: 1. Crochet this rug 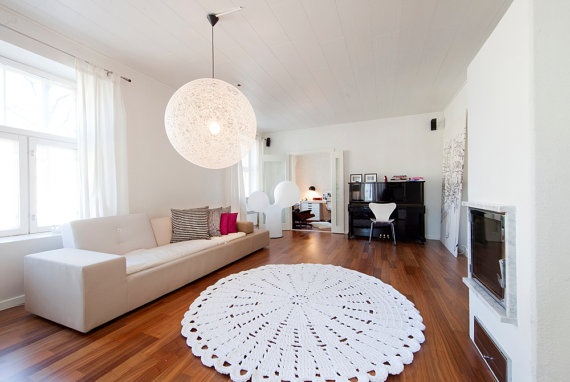
2. Make curtains 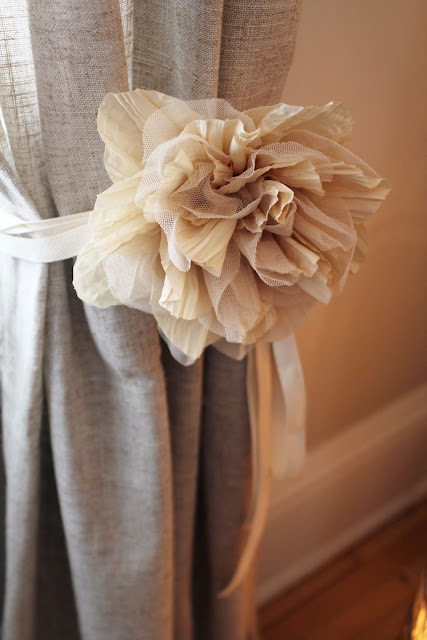
3. This week and next week boards as well as a date night idea board 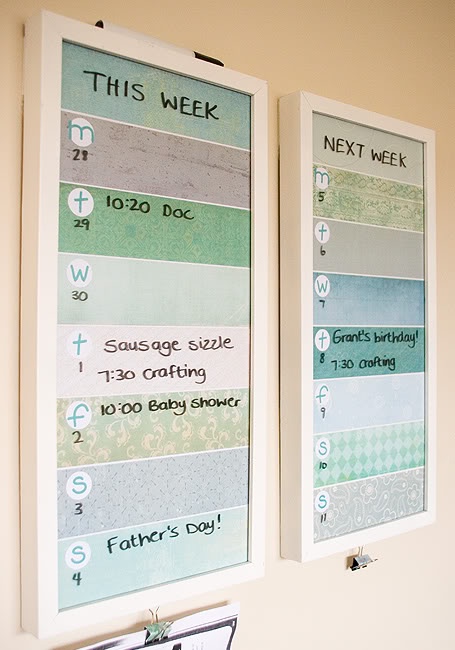
4. Homemade Deodorant before I run out 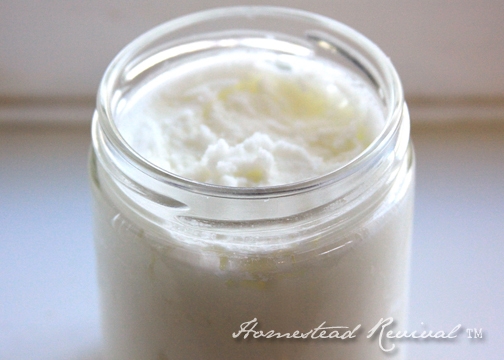
5. Awesome bow skirt 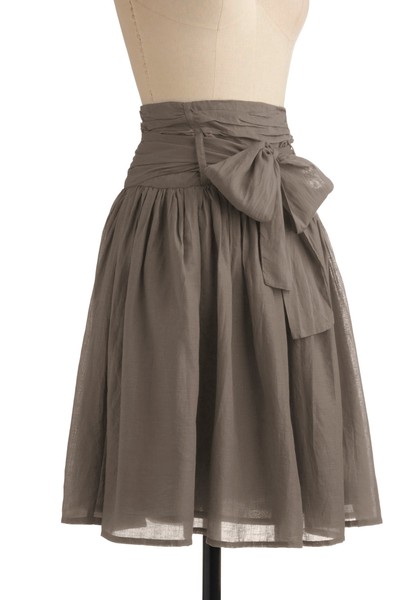
6. Overhead lighting solution for living room (look at the light in the room with the rug) 7. Something for my husband (and no, Will, you are not allowed to go to my board and see what it is) 8. This fun scarf 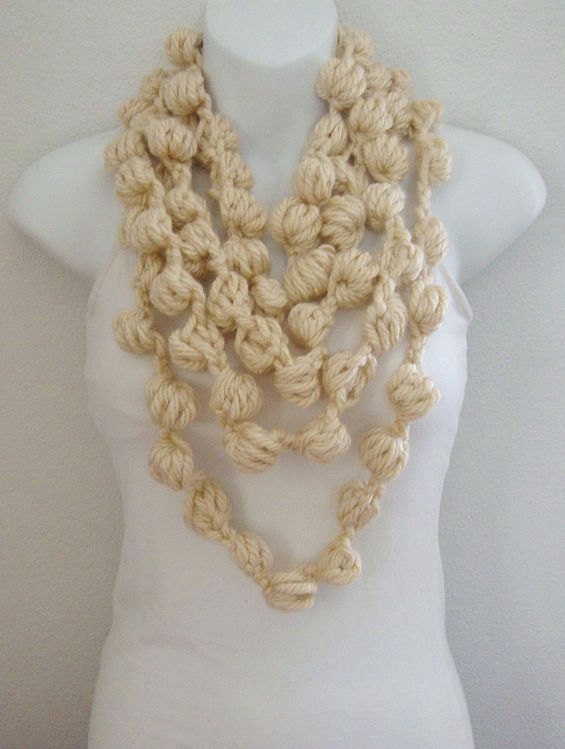
9. Spinach, avacado, and grilled cheese sandwich 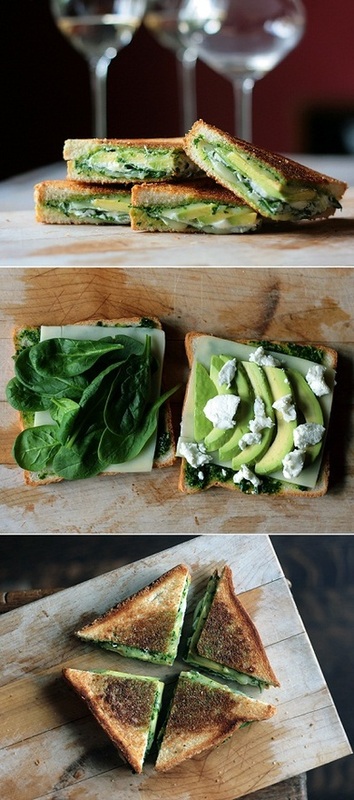
10. Healthy nobake cookies. Oats, banana, pb, cocoa, applesauce, and vanilla. No sugar. 47 cal each 
We shall see how this new idea board goes...hopefully I'll have a lot of finished projects to post about


to see more visit http://suzedesign.weebly.com/couples.html
Congratulations to Adam and Savannah Lynch who got married today. I was honored to photograph their wedding as they enter into a new stage of life. There are more pictures and details to come but here is a teaser.
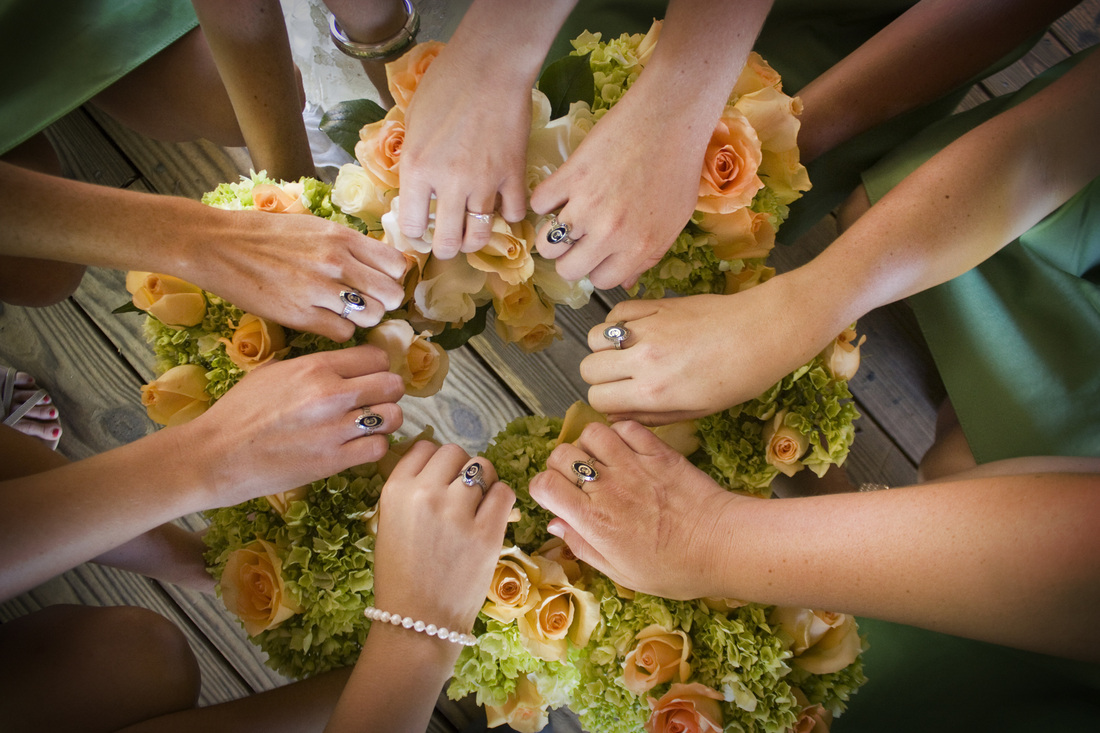
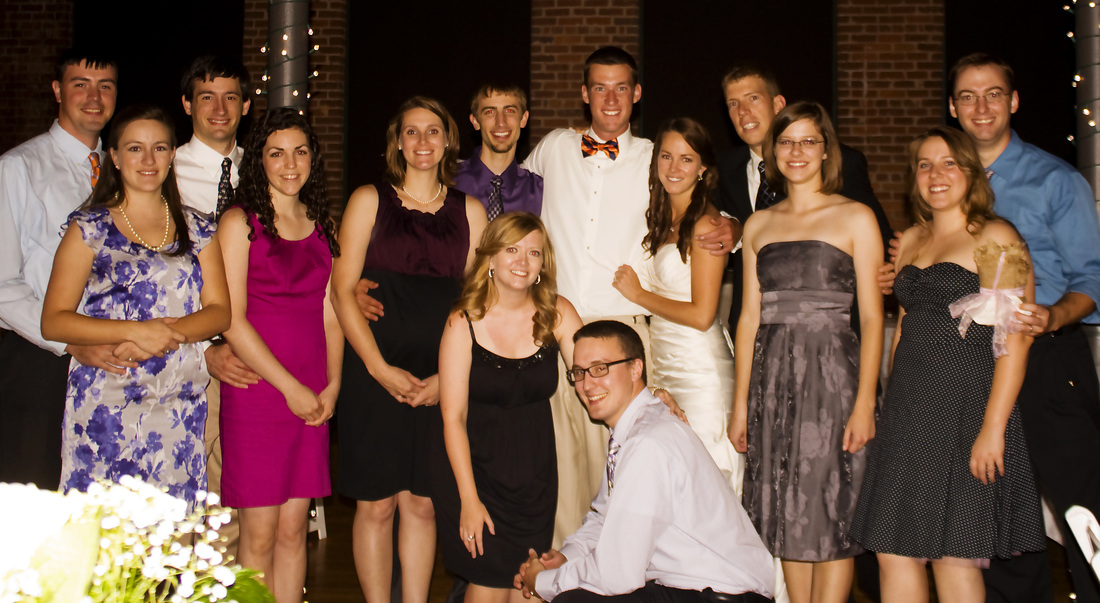
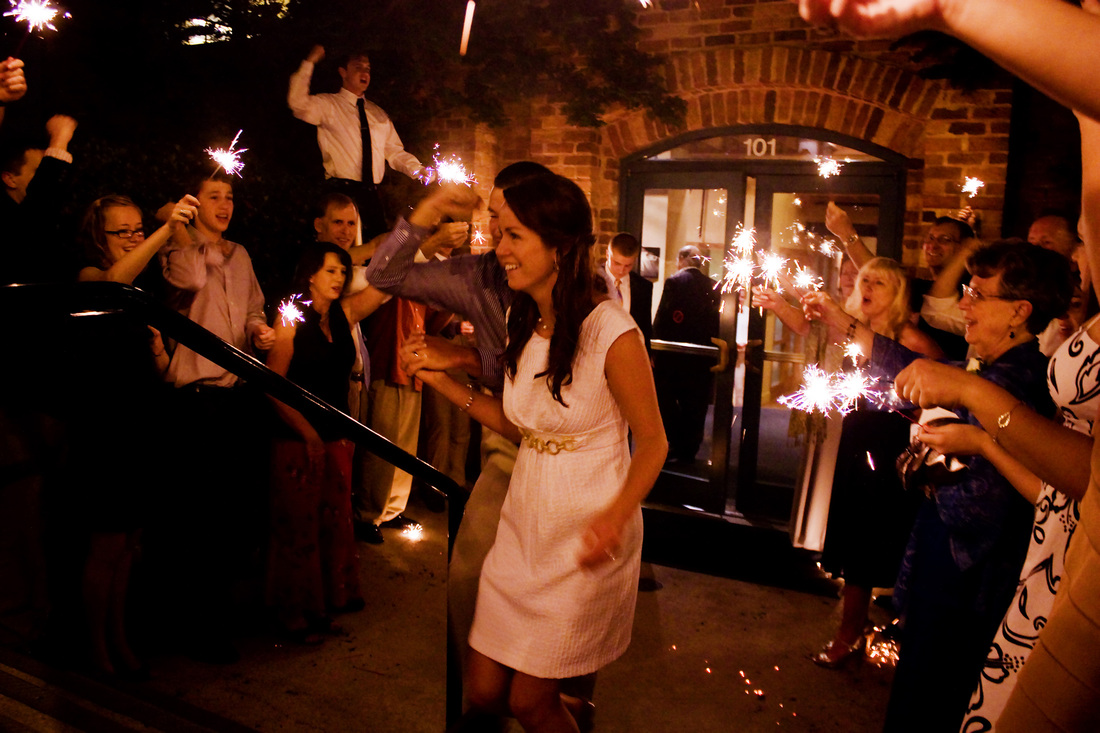
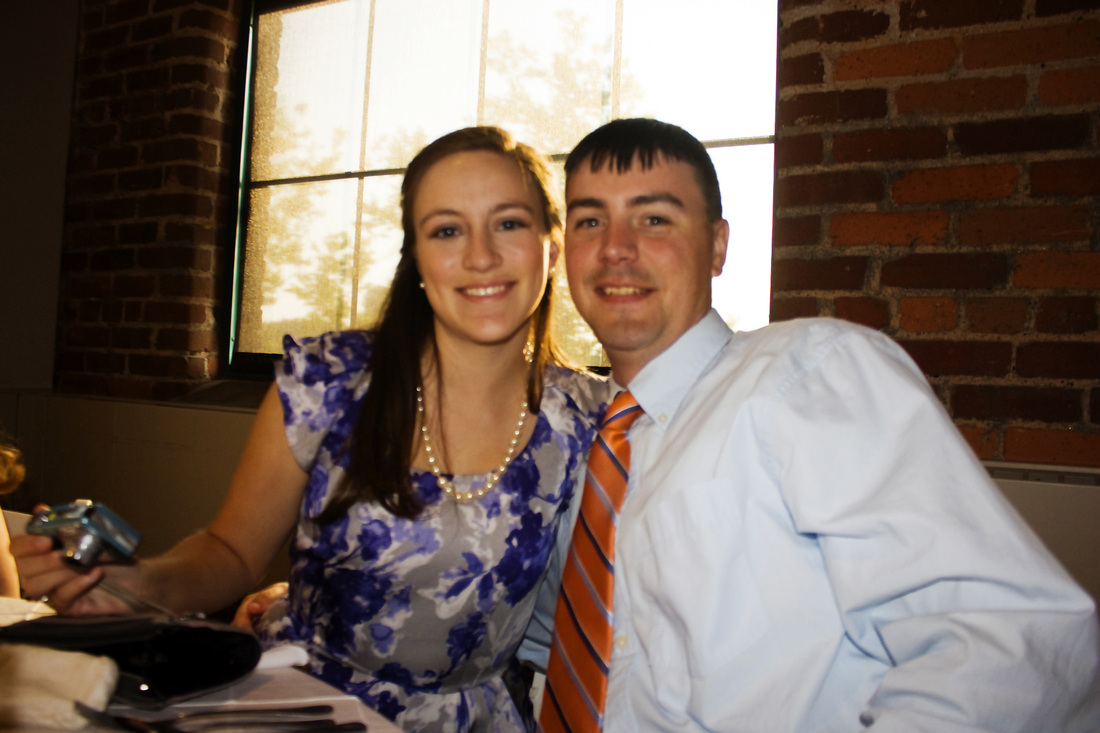
Congrats to David and Sarah who got hitched on Saturday. They were a couple who joined our church shortly after getting engaged and joined our newlywed cp group to learn from newlyweds before getting married, graduating, and moving on to jobs and their next stage of life. We enjoyed getting to know them this past semester and I look forward to seeing them grow as a couple the next few months before they move away. Here are some of the highlights of their wedding...  Its hard to tell but we managed to grab our own cp group block seating at the wedding 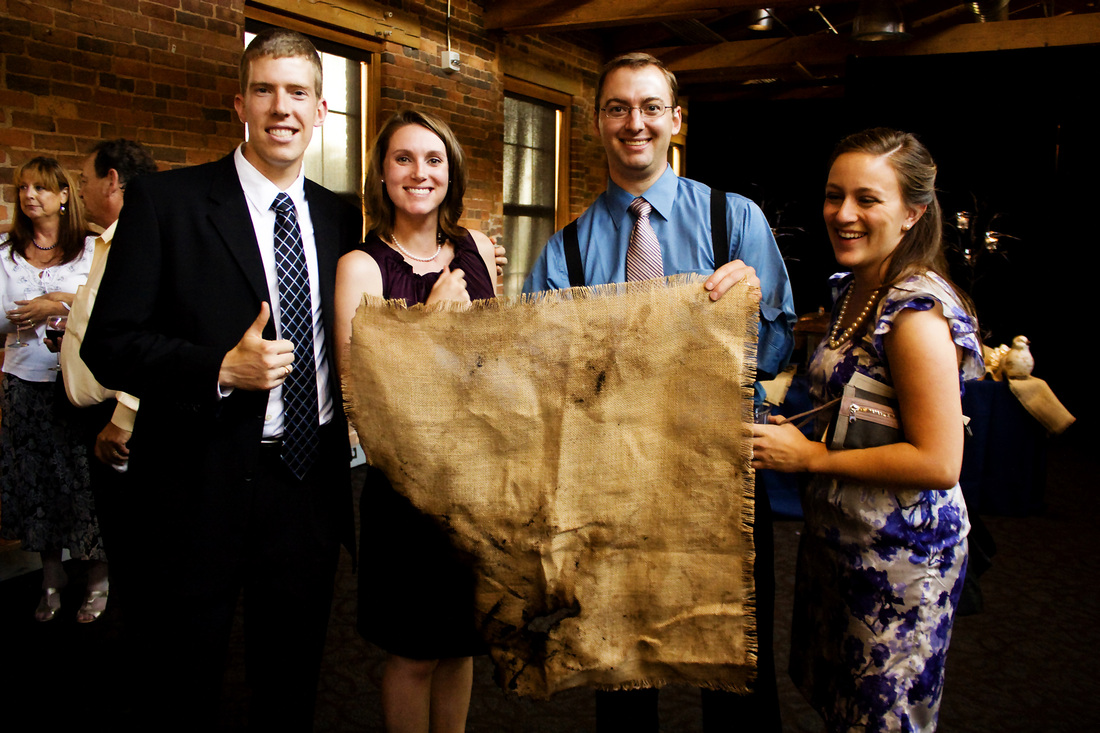 Funny story...so we were are coctail hour of the reception, hanging out waiting for the party to show up and Laura looked over and this burlap square had caught on fire by one of the chafing dishes...Kelly's maternal instincts suddenly kicked in and she started running to the fire and started fanning it (which kind of made the fire grow more). Luckily its hard to miss a pregnant lady running across the room and then stopping to wave her arms, so she grabbed Ben's attention who rushed over and poured his beer on it and put it out. My husband then retrieved the burlap square and wrapped it as a gift so we could give a group gift to the lucky couple
   |
AuthorWe are the Rogers. We have been married since August and are loving it! Will recently graduated with his PhD in Civil Engineering and I am currently an IT assistant by day and a photographer by night.  Categories
All
Archives
June 2015
|


 RSS Feed
